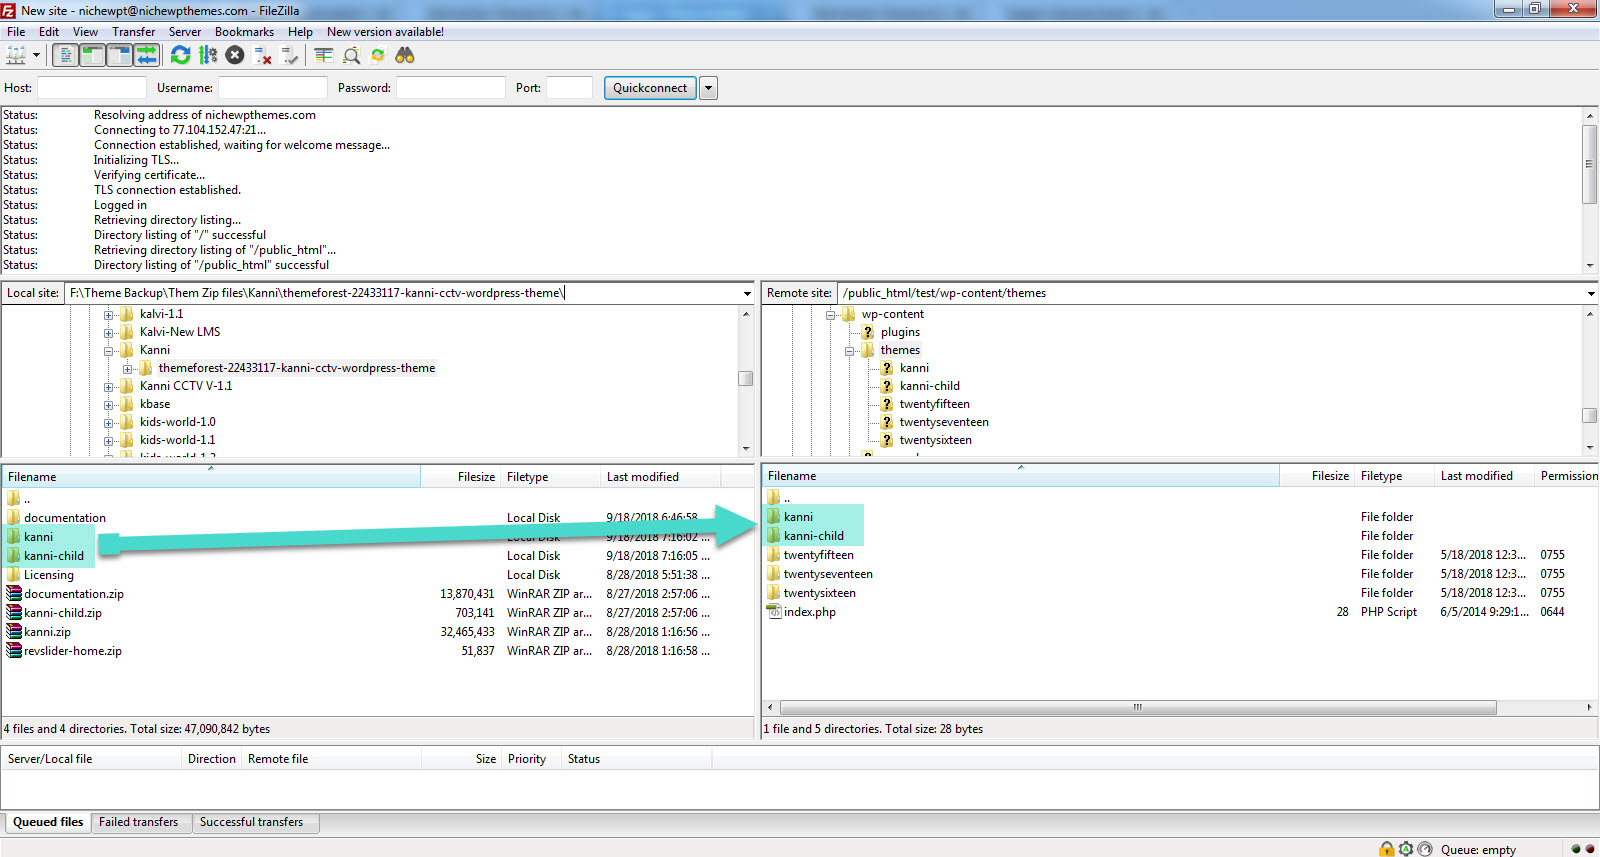
Step 1: Log into your Hosting server space using any FTP software (applications like FileZilla) at first.
Step 2: Extract the “kanni.zip” (inside “kanni-1.1.zip”) file as you’ve downloaded.
Step 3: Upload that extracted folder (kanni) into your “wp-content / themes” directory.
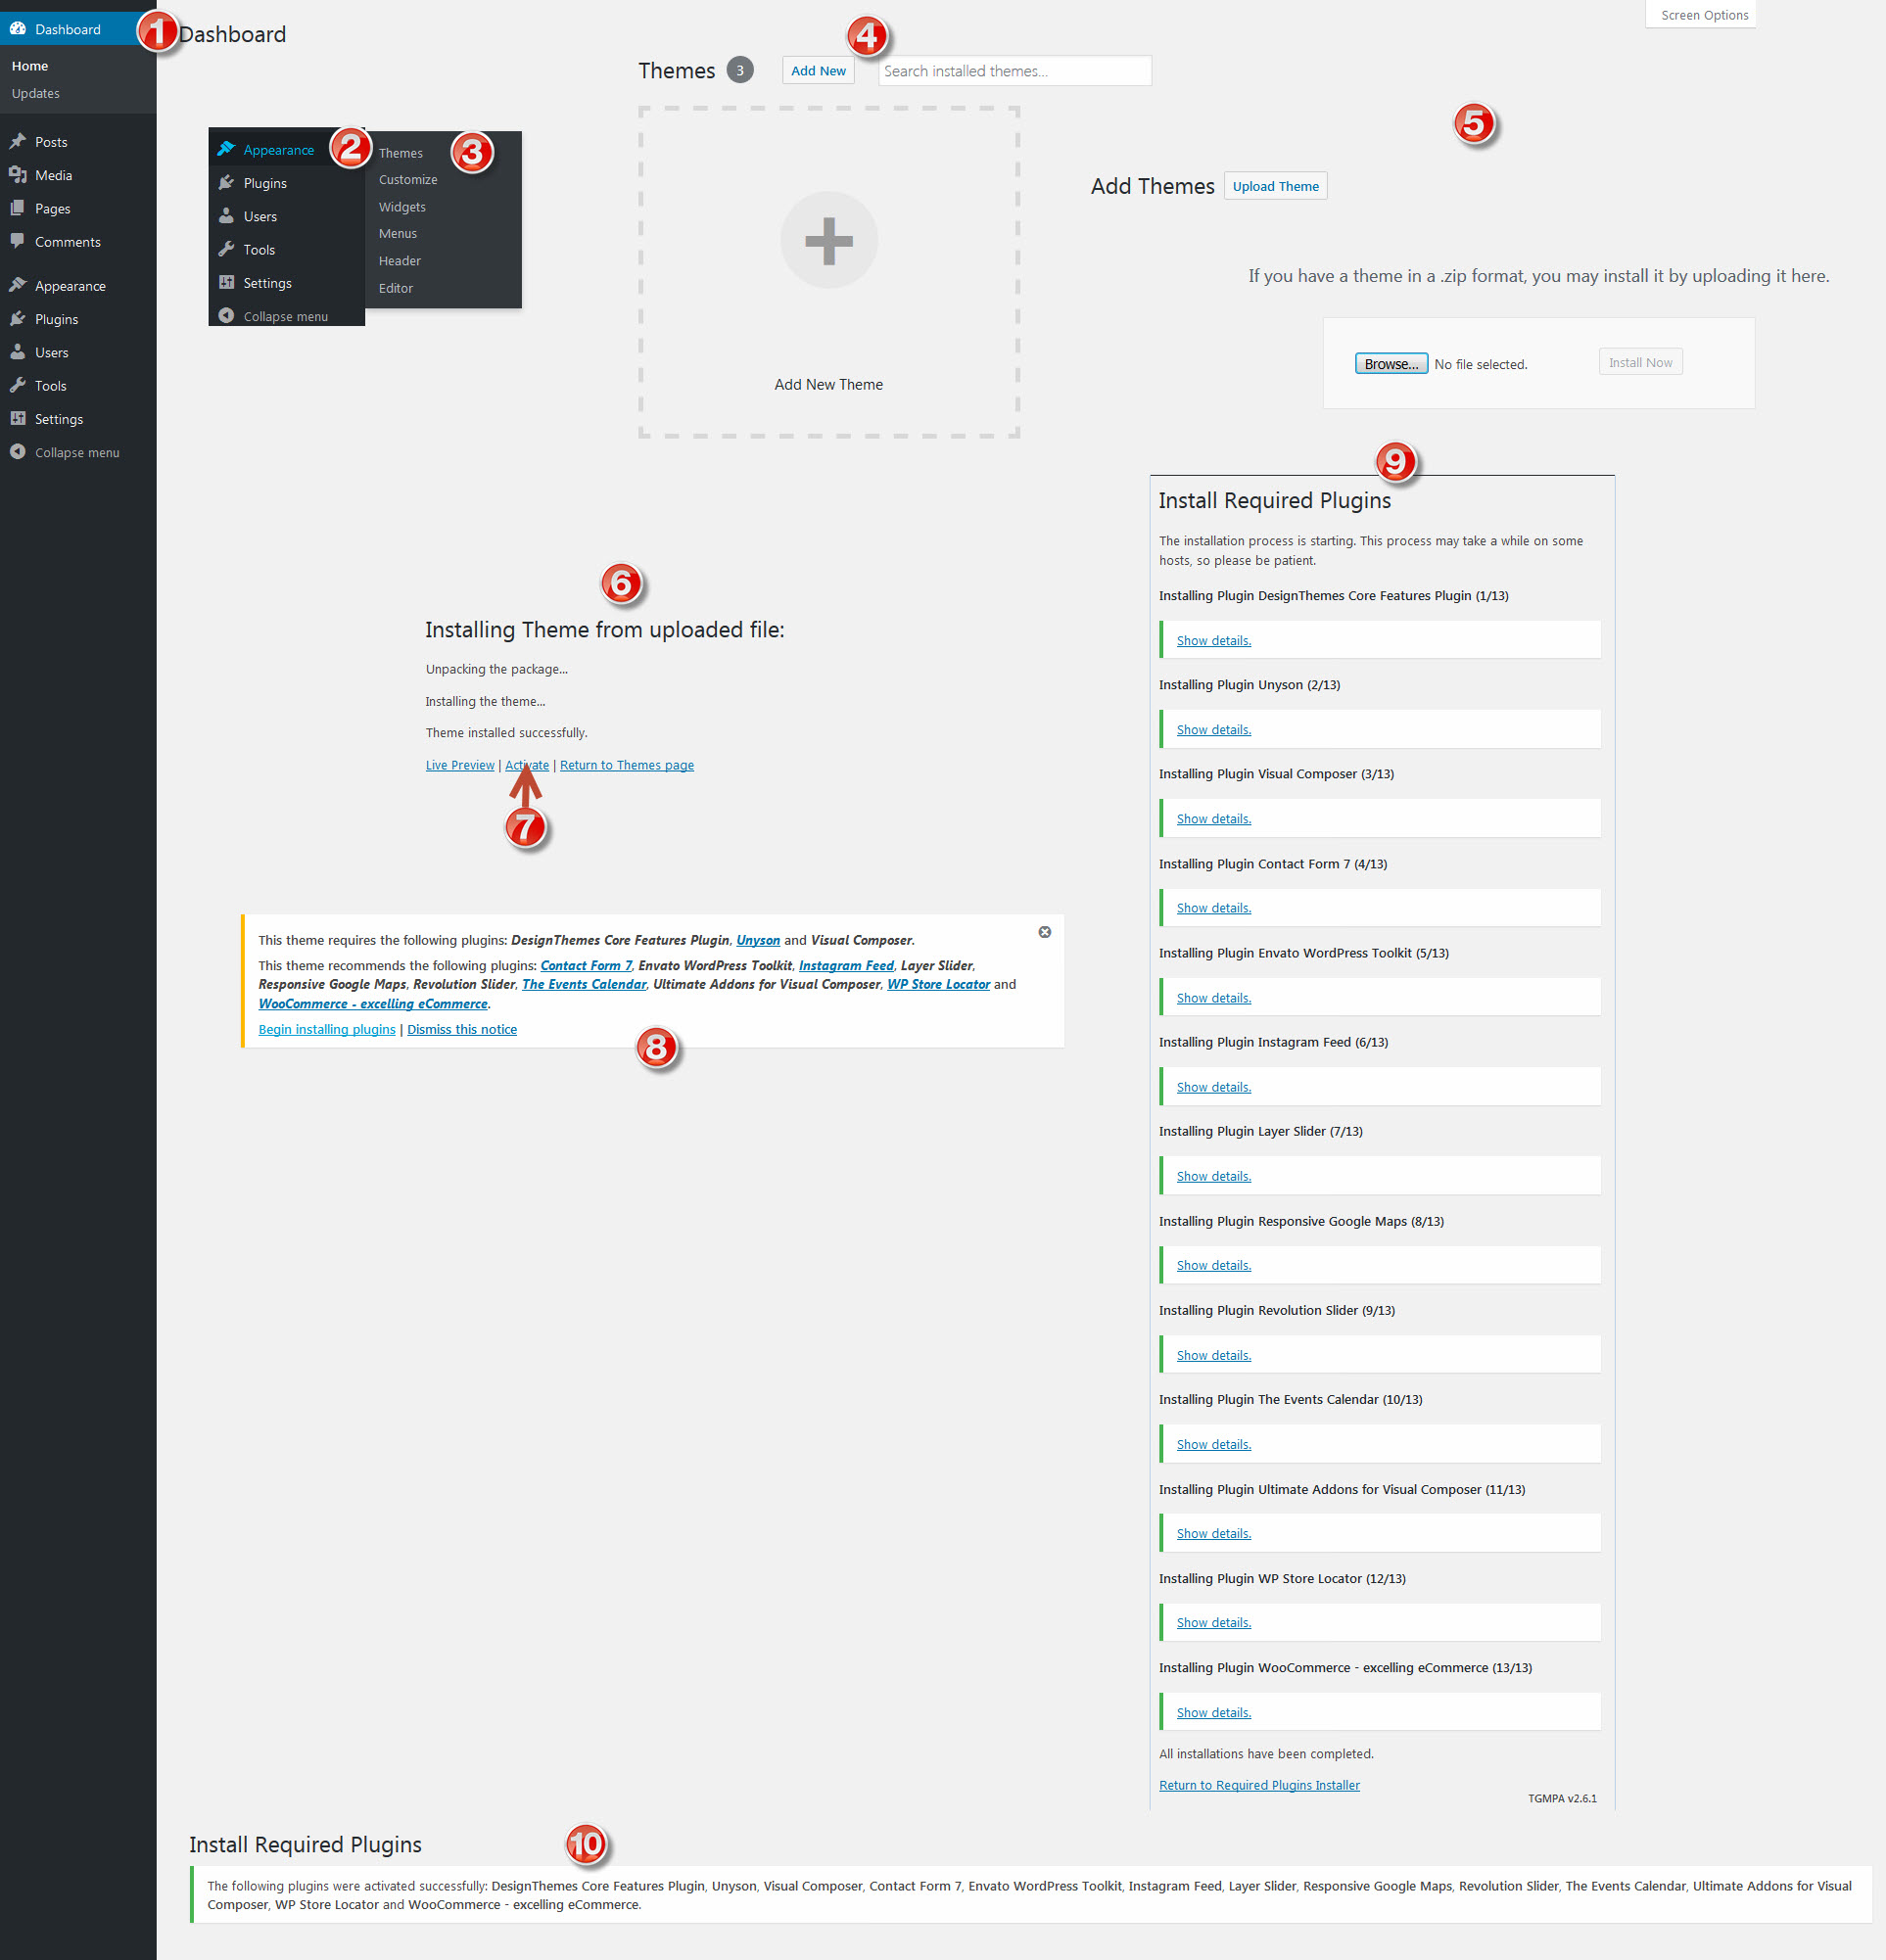
Step 4: Once uploaded the theme then go to Appearance > Themes and click “Activate” button to activate the theme.
Step 5: Then you will see a notification message to install and activate the required & recommended plugins. Click “Begin installing plugins” to install and activate the required & recommended plugins.
Note : ‘DesignThemes Core Features Plugin’ should be installed and activated immediately as the prompted features will be loaded only if this plugin is activated.
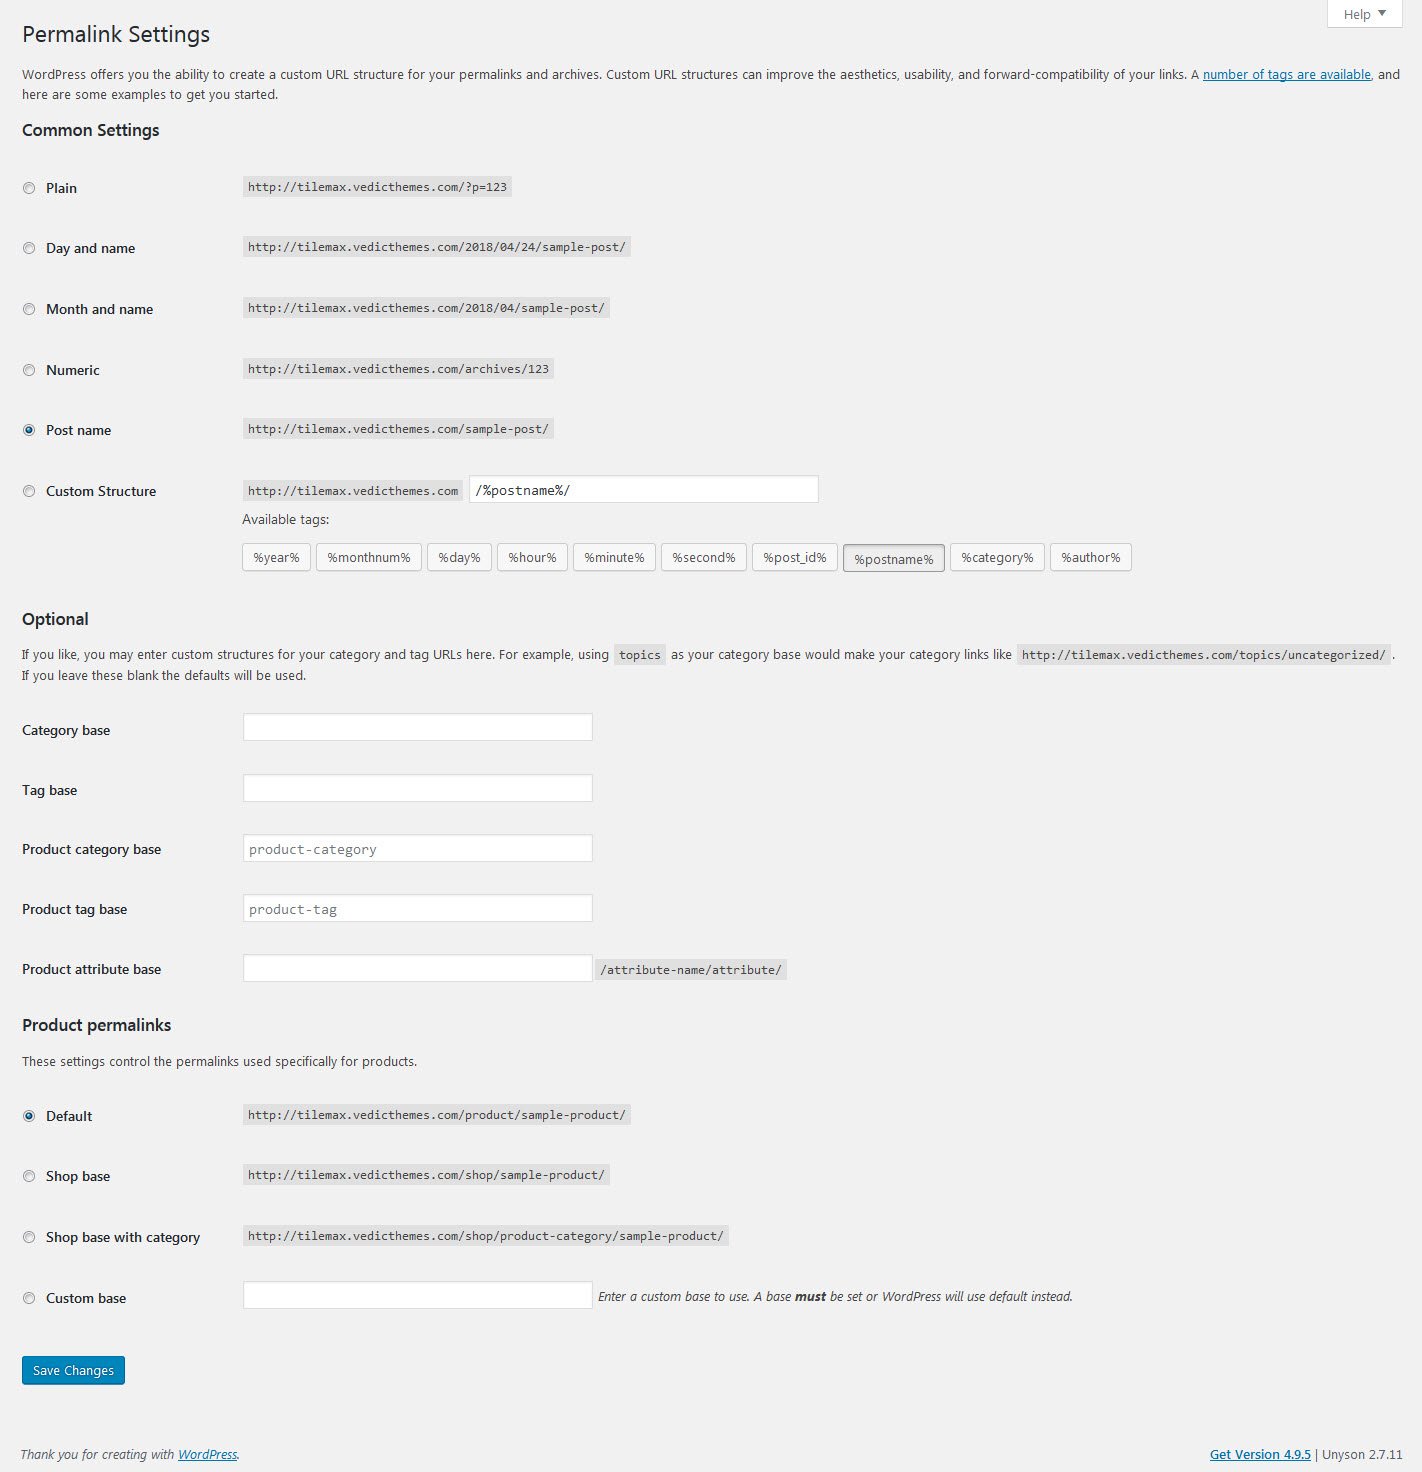
Step 6: Once required plugins are activated, navigate to Settings > Permalinks, select ‘Post name’ in ‘Common Settings’ tab and save it.
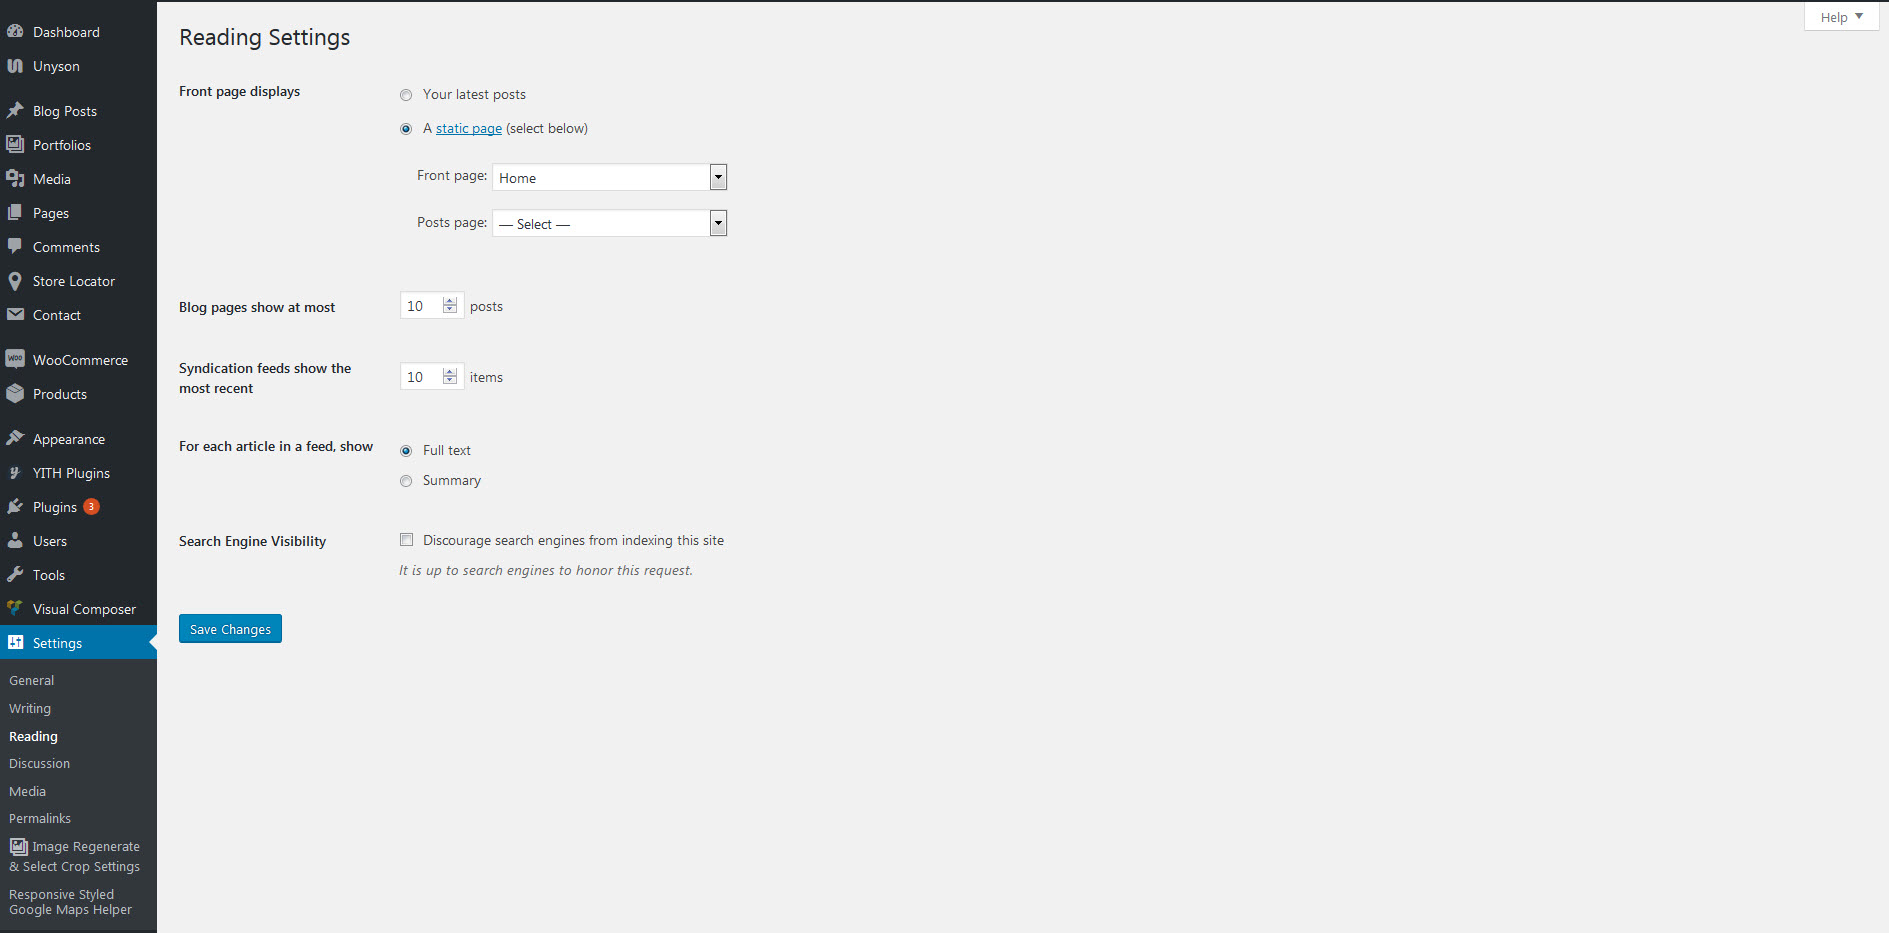
Step 7: Set Your Home Page Navigate to Settings > Reading tab, Select A Static Page option, Choose the page you want as your home page from the Front Page dropdown list. This is also the same spot you select the blog page as the Posts page and save it.