Events Options
DIGIBit is loaded with options for the Events. It offers many different options for you to present your Events, along with several different Events layouts. In addition there are numerous Theme Options and Shortcode Options that allow you to customize how Events are displayed.
Events
No matter which method or methods you use to display your Events, the first thing you need to do is create the Events, Venues and Organizers.
How To Create A Events
Step 1 – Navigate to Dashboard > Events in your WordPress admin sidebar.
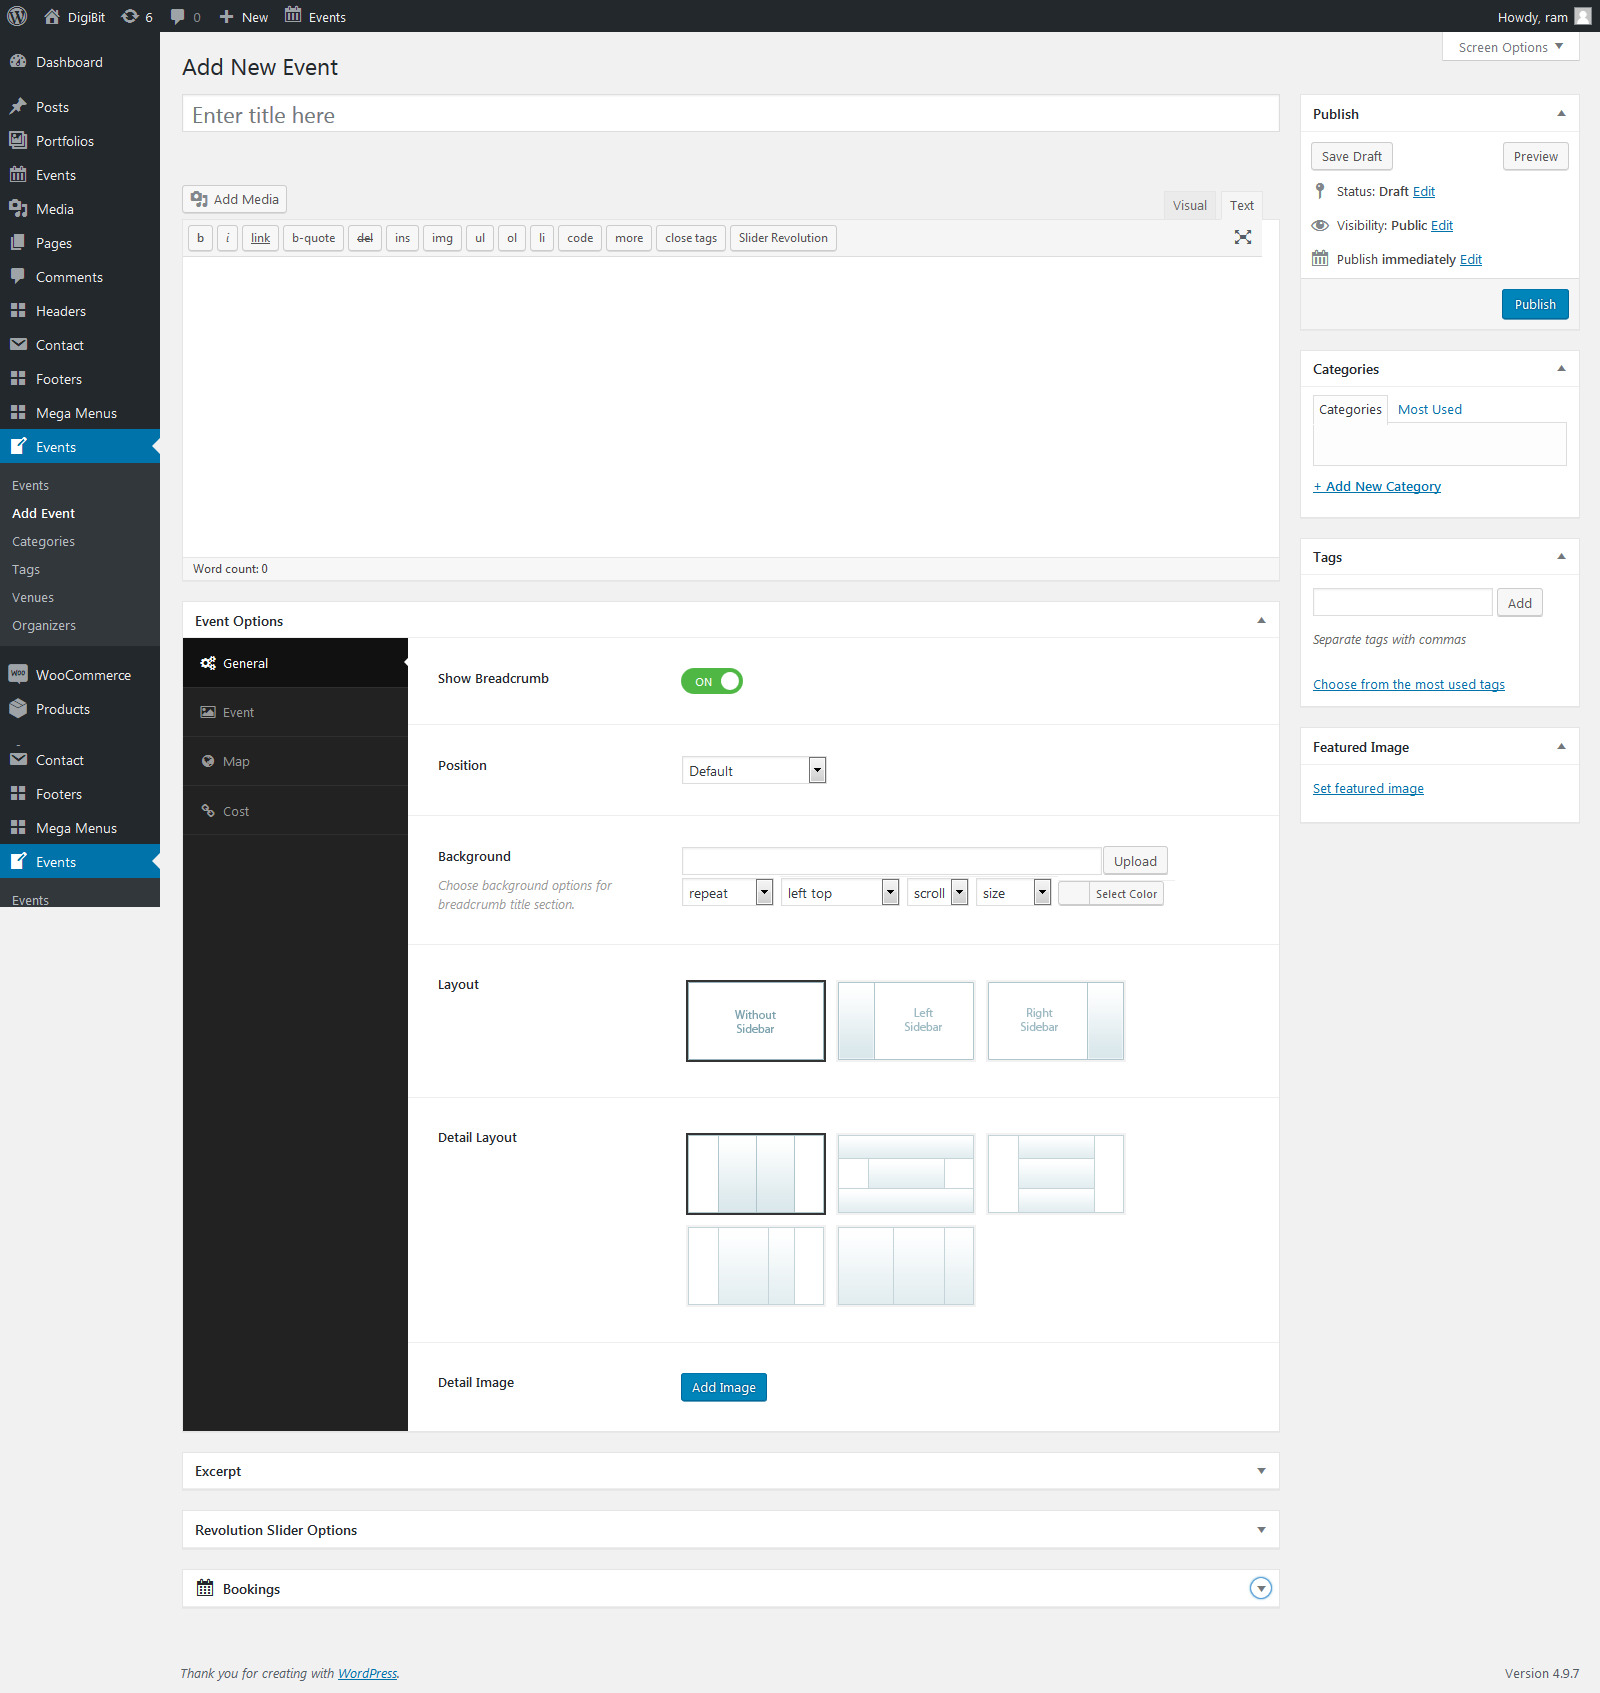
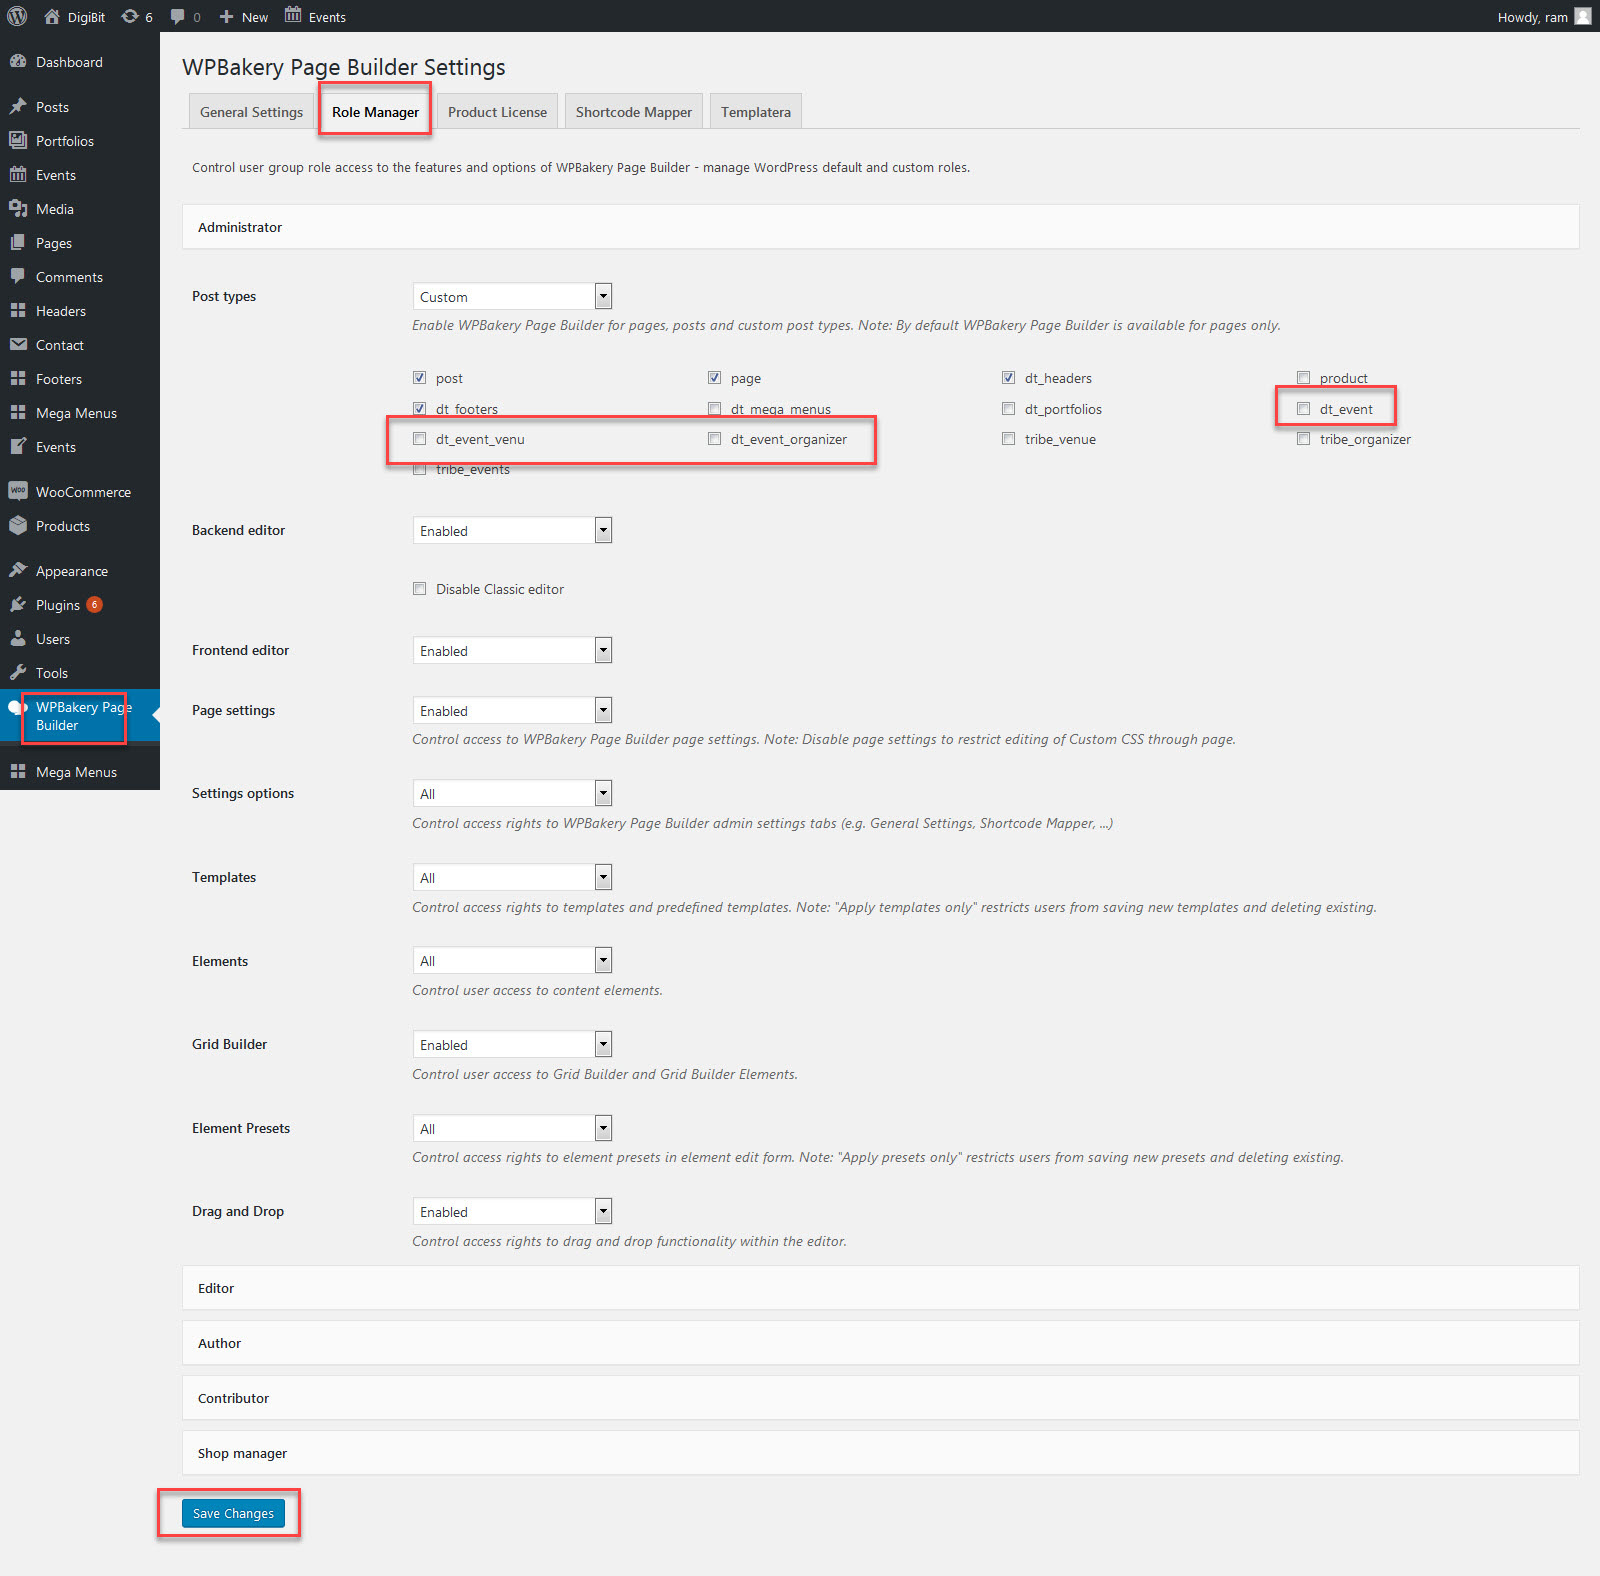
Step 2 – Click on the Add New option to make a new Event. Create a title, and insert your Event content in the editing field. You can use any of our visual composer builder elements inside the Event ( you can enable the visual composer modules from Dashboard > WPBakery Page Builder > Role Manager Administrator > Post types > Custom check the option for dt_event, dt_event_venu and dt_event_organizer and save the chnages).
Step 3 – Add Categories and Tags from the right side. To assign it to the Events, check the box next to the Category and tag name.
Step 4 – For a single image, click the first Featured Image Box, select an image and click the Set Featured Image button.
Step 5 –
Event Options
- General – Here you can enable or disable Classes breadcrumb with Show Breadcrumb option, you can set breadcrumb Position, Choose background options (image or color)for breadcrumb title section and select your Event Layout and also you can select your Event Detail Layout and Event Detail Image.
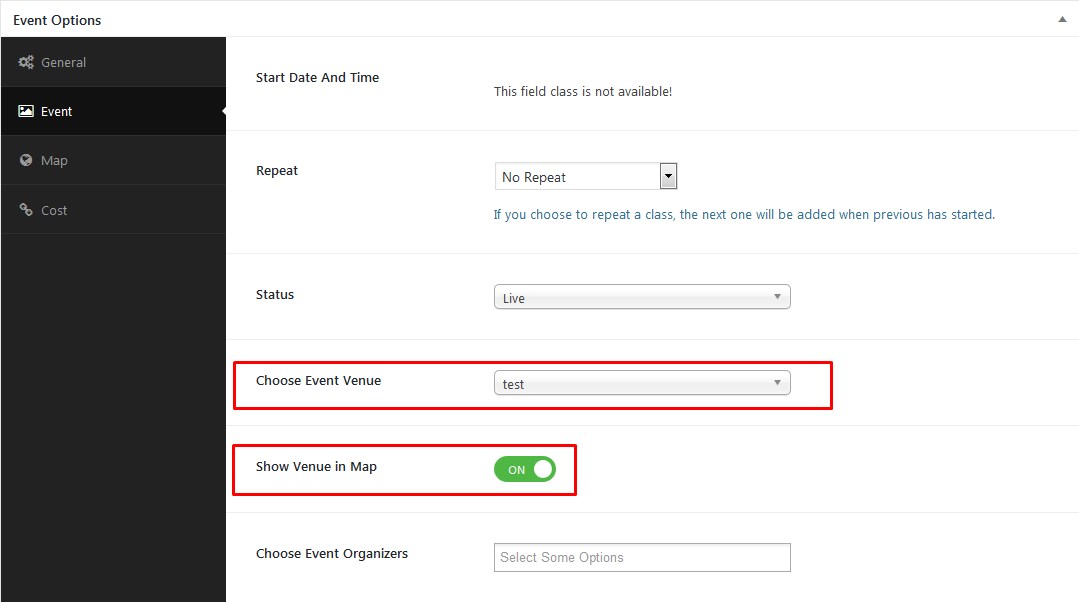
- Event – Here you can select Start Date And Time, Event Repeat, Event Status, Choose Event Venue ( You need to create the venues, then you can select the even from this drop down and enable Show Venue in Map then only the Event map option will show the event) and you can Choose Event Organizers (you need to create the organizers).
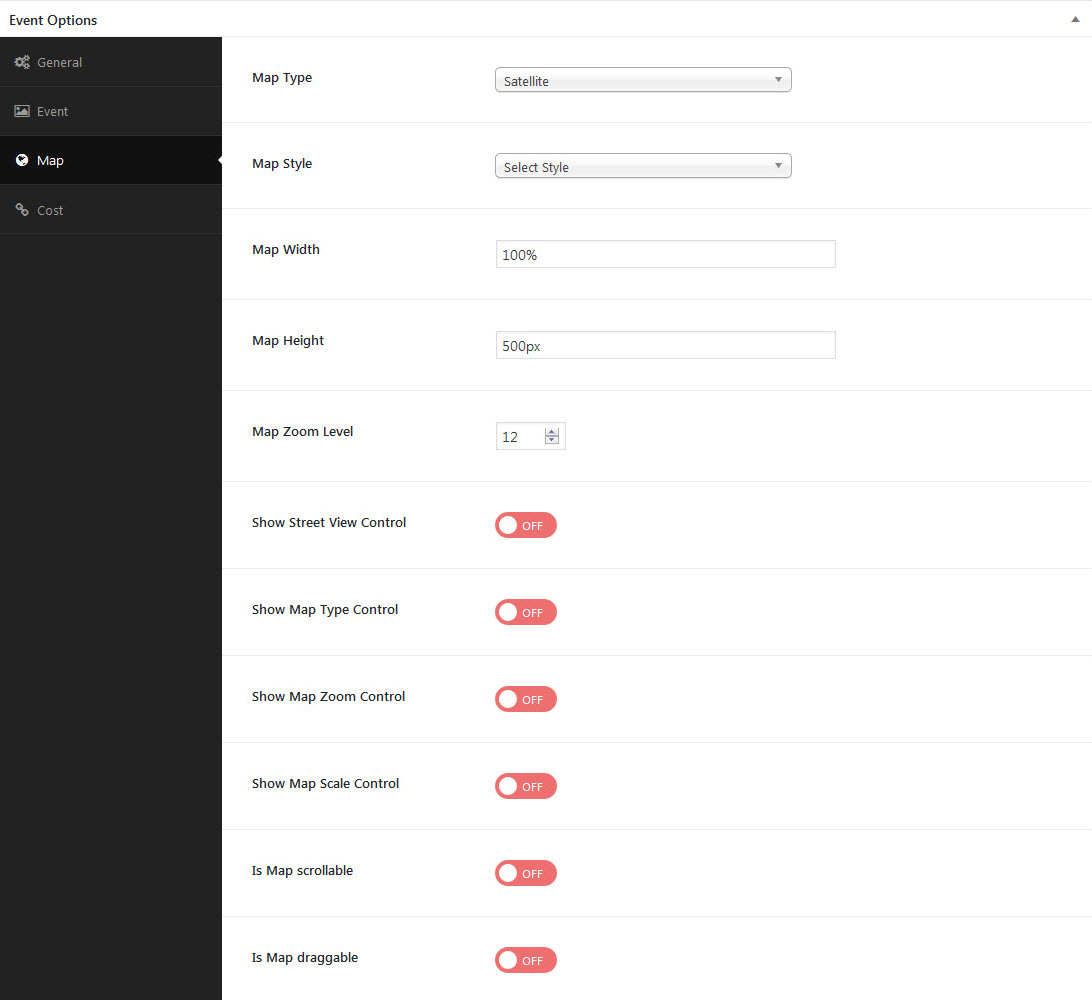
- MAP – Here you can select your map option for select event venue
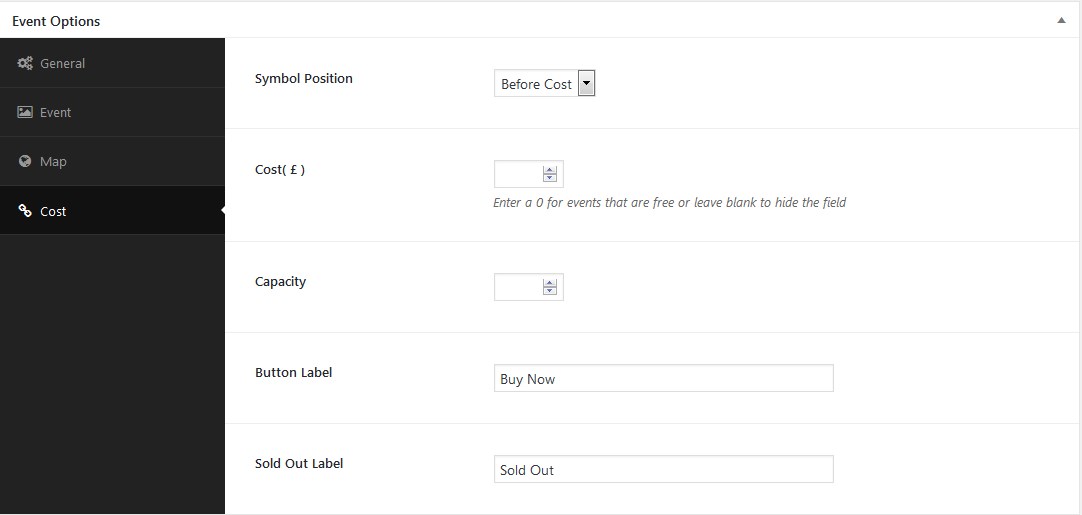
- Cost – Here you can select your Cost Symbol Position, Cost (Enter a 0 for events that are free or leave blank to hide the field), Capacity, Button Label and Sold Out Label.
Step 6 – Once you are finished, click Publish to save the post.
How To Create A Event Venues
Step 1 – Navigate to Dashboard > Events > Venues in your WordPress admin sidebar.
Step 2 – Click on the Add Venue option to make a new Venue. Create a title, and insert your Event Venue content in the editing field. You can use any of our visual composer builder elements inside the Event ( you can enable the visual composer modules from Dashboard > WPBakery Page Builder > Role Manager Administrator > Post types > Custom check the option for dt_event, dt_event_venu and dt_event_organizer and save the chnages).
Step 3 – For a single image, click the first Featured Image Box, select an image and click the Set Featured Image button.
Step 4 – Venue Information Enter you venue information’s like Address 1, Address 2, City, Country, State or Province, Postal Code, Phone Number, Website URL, Latitude and Longitude values
Step 5 – Once you are finished, click Publish to save the post.
How To Create A Event Organizer
Step 1 – Navigate to Dashboard > Events > Organizers in your WordPress admin sidebar.
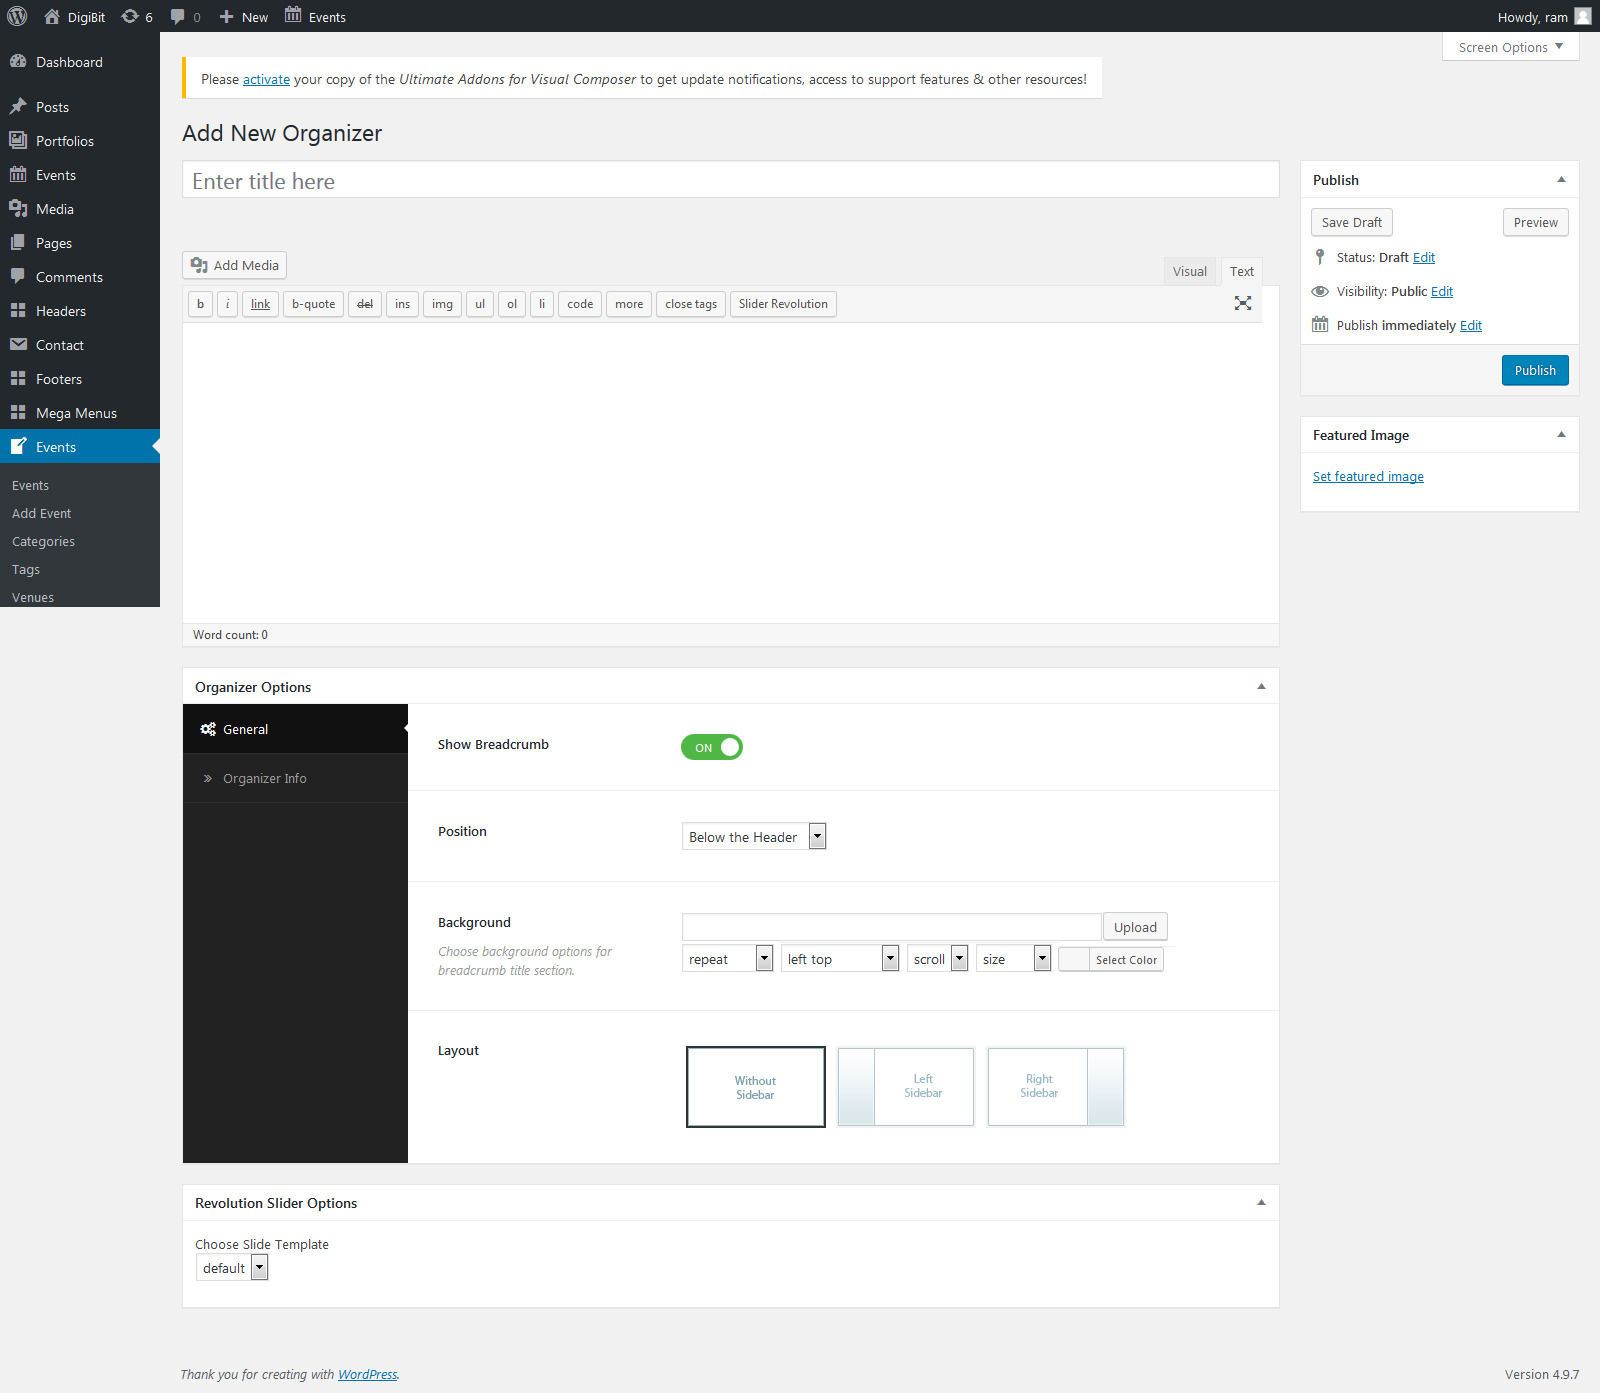
Step 2 – Click on the Add Organizer option to make a new Venue. Create a title, and insert your Event Organizer content in the editing field. You can use any of our visual composer builder elements inside the Event ( you can enable the visual composer modules from Dashboard > WPBakery Page Builder > Role Manager Administrator > Post types > Custom check the option for dt_event, dt_event_venu and dt_event_organizer and save the chnages).
Step 3 – For a single image, click the first Featured Image Box, select an image and click the Set Featured Image button.
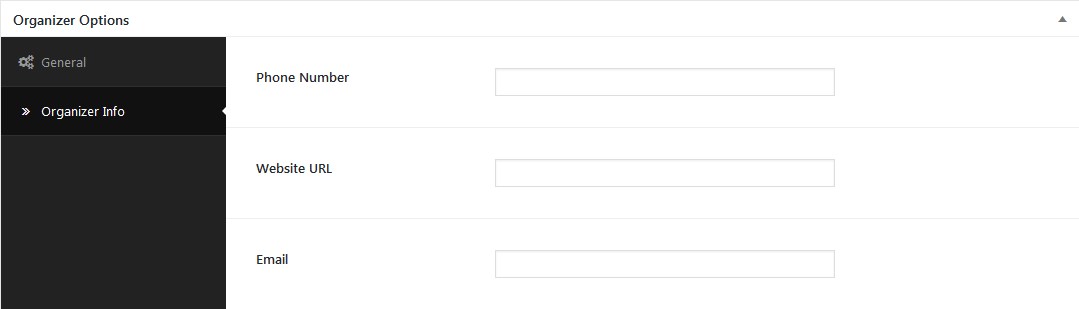
Step 4 –
Organizer Options
- General – Here you can enable or disable Classes breadcrumb with Show Breadcrumb option, you can set breadcrumb Position, Choose background options (image or color)for breadcrumb title section and select your Event Organizer Layout.
- Organizer Info – Here you can give you Organizer Phone Number, Website URL and Email.
Step 5 – Once you are finished, click Publish to save the post.