1Theme Documentation
Thank you very much for having purchased Designthemes Store Locator WordPress Plugin.
This documentation file helps you to understand how it works.
If you have any questions that are not answered here, please feel free to email us at support@wedesignthemes.com
Let's get it started :)
All of your emails will be reviewed and checked carefully. However, based on the number support tickets and the nature of the request itself, the response time can be up to 1-2 business days.
Purpose of the plugin
A good business storelocator plugin allows you to easily create lists of businesses organized by location, category, and other parameters. Business directories help users find new vendors while helping businesses connect with customers and other businesses
Store Locator plugin allows you to take the listings you want and build a local storelocator, simple storelocator of business providers, a real estate listings site, hotel, restaurant, a Yellow-Pages storelocator, a Yelp clone with review sections, a church storelocator, an address book storelocator, a book review site, and much more.
Read the item documentation first
Many support queries and technical questions will already be answered in supporting documentation such as FAQ's and comments from previous buyers. We also make sure that all of the items sold on Envato Market have documentation included so always check the included information and if you can’t find the answer you’re looking for then consider whether the author might be able to help.
1.1 About the Plugin
If you need any assistance that are beyond the scope of this help file, kindly contact us through mail. Thank you so much!
Theme Customization
In most cases, this is anything that falls outside of the options the theme offers. We work with an amazing customization team. They have unique offerings and can provide the services you need to customize your plugin.
Note : if it's a minor customization means, we will do it for free. If any customization work takes more than 1 hour, we will charge $25/ per hour.
1.2 Download the Plugin
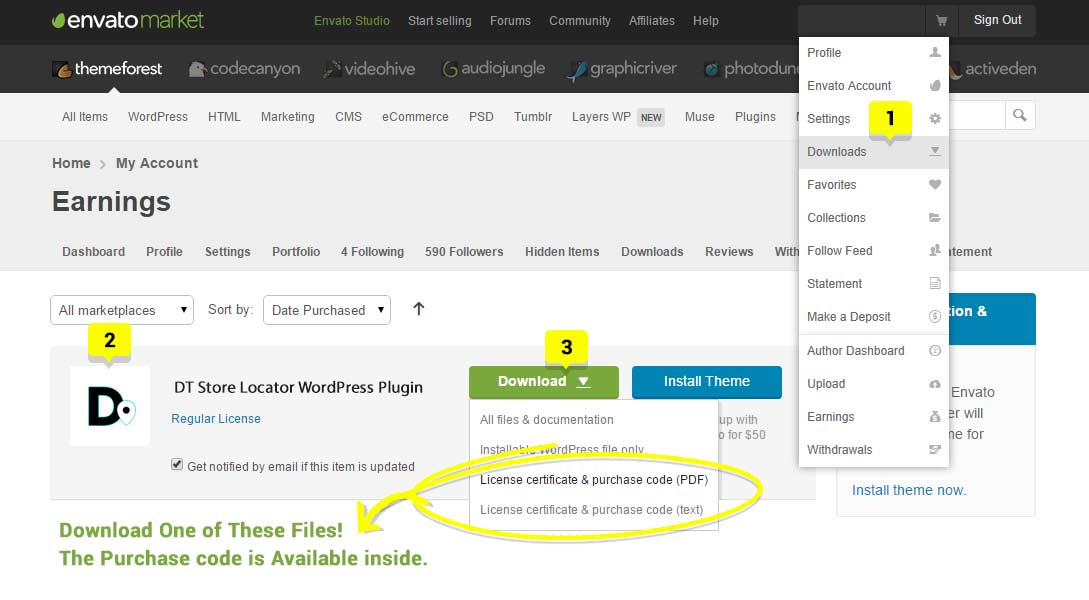
When you purchase our theme from ThemeForest, you can download the Store Locator Plugin files via the ‘Downloads’ tab on your ThemeForest account.While you download Store Locator Plugin, you can choose the ‘All Files & Documentation’. This will includes the theme files and supporting documents.
Step 1 – Login to your ThemeForest account and navigate to the ‘Downloads’ tab.
Step 2 – Locate your Theme purchase, and click the Download button. Choose between ‘All Files & Documentation’.
1.3 Plugin Information
Store Locator Plugin Features
- Display the info modal on hover with individual settings and styling options
- Set the position of the map to left or right with margin settings
- Distance unit can be set in Kilometers or Miles
- Enable and style the pin info in the map
- Set the map to display a road map or satellite
- Set the default position and zoom level
- Add Unlimited locations to showcase store listings, class locations, job locations, events listing and other locations with the use of Google maps.
- Fully Responsive layout out of the box.
- Show Distance to each Store from Current Location.
- Set default Center for Google Maps.
- Customize your map with easy WYSIWYG interface.
- Enable the auto geolocation once the page is loaded
- Style the geolocation button with a custom button text
- Show a circle in the map to identify the user address in the map
2Downlaod & Install
When you purchase our Plugin from codecanyon, you need to download the Store Locator Plugin files from your codecanyon account. Navigate to your downloads tab on codecanyon and find storelocator-pro. Click the download button to see the two options. The Main Files contain everything, the Installable WordPress Plugin is just the installable WordPress Plugin file. Below is a full list of everything that is included when you download the main files, along with a brief description of each item
Installation Requirements
The followings are required of your server (or your website) to install Directories Pro:
- PHP 5.4.0 or greater
- MySQL 5.0.3 or greater
- WordPress 5.1.0 or greater
Once your server has been confirmed to meet all the requirements above, proceed to the next step to download and install Directories plugin.
2.1Install Plugin via WordPress Dashboard
You can download plugins directly to your blog by using the Add New plugins option in the Appearance sub-menu.
Step 1 : Log in to the WordPress Administration Panels.
Step 2 : Select the Appearance panel, then plugins.
Step 3 : Select Add New.
Step 4 : Either use the Search or Filter options to locate a Plugin you would like to use.
Step 5 : Click on the Preview link to preview the Plugin or the Install Now link to upload the Plugin to your blog,
Step 6 : Or use the Upload link in the top links row to upload a dt-storelocator.zip copy of a Plugin that you have previously downloaded to your machine.
Save Permalink: After installing the plugin successfully. Change the permalink from dashboard settings > permalinks and set the permalink to post name. By default it's normally set to Day and name.
2.2 Plugin Installation via cPanel
If your host offers the cPanel control panel, and the Plugin files are in a .zip or .gz archive follow these instructions. Note: This assumes the Plugin you download is a compressed (dt-storelocator.zip) file containing a folder under which all the Plugin files reside.
Step 1 : Download the Plugin dt-storelocator.zip file to your local machine.
Step 2 : In cPanel File Manager, navigate to your plugins folder. If your WordPress is installed in the document root folder of your web server you would navigate to "public_html/wp-content/plugins" and if you have WordPress installed in a sub-folder called wordpress, you would navigate to "public_html/wordpress/wp-content/plugins".
Step 3 : Once you've navigated to the plugins folder in cPanel File Manager, click on Upload file(s) and upload that .zip file you saved in Step 1.
Step 4 : Once the .zip file is uploaded, click on the name of that file in cPanel, then in the panel to the right, click on "Extract File Contents", and that .zip file will be uncompressed.
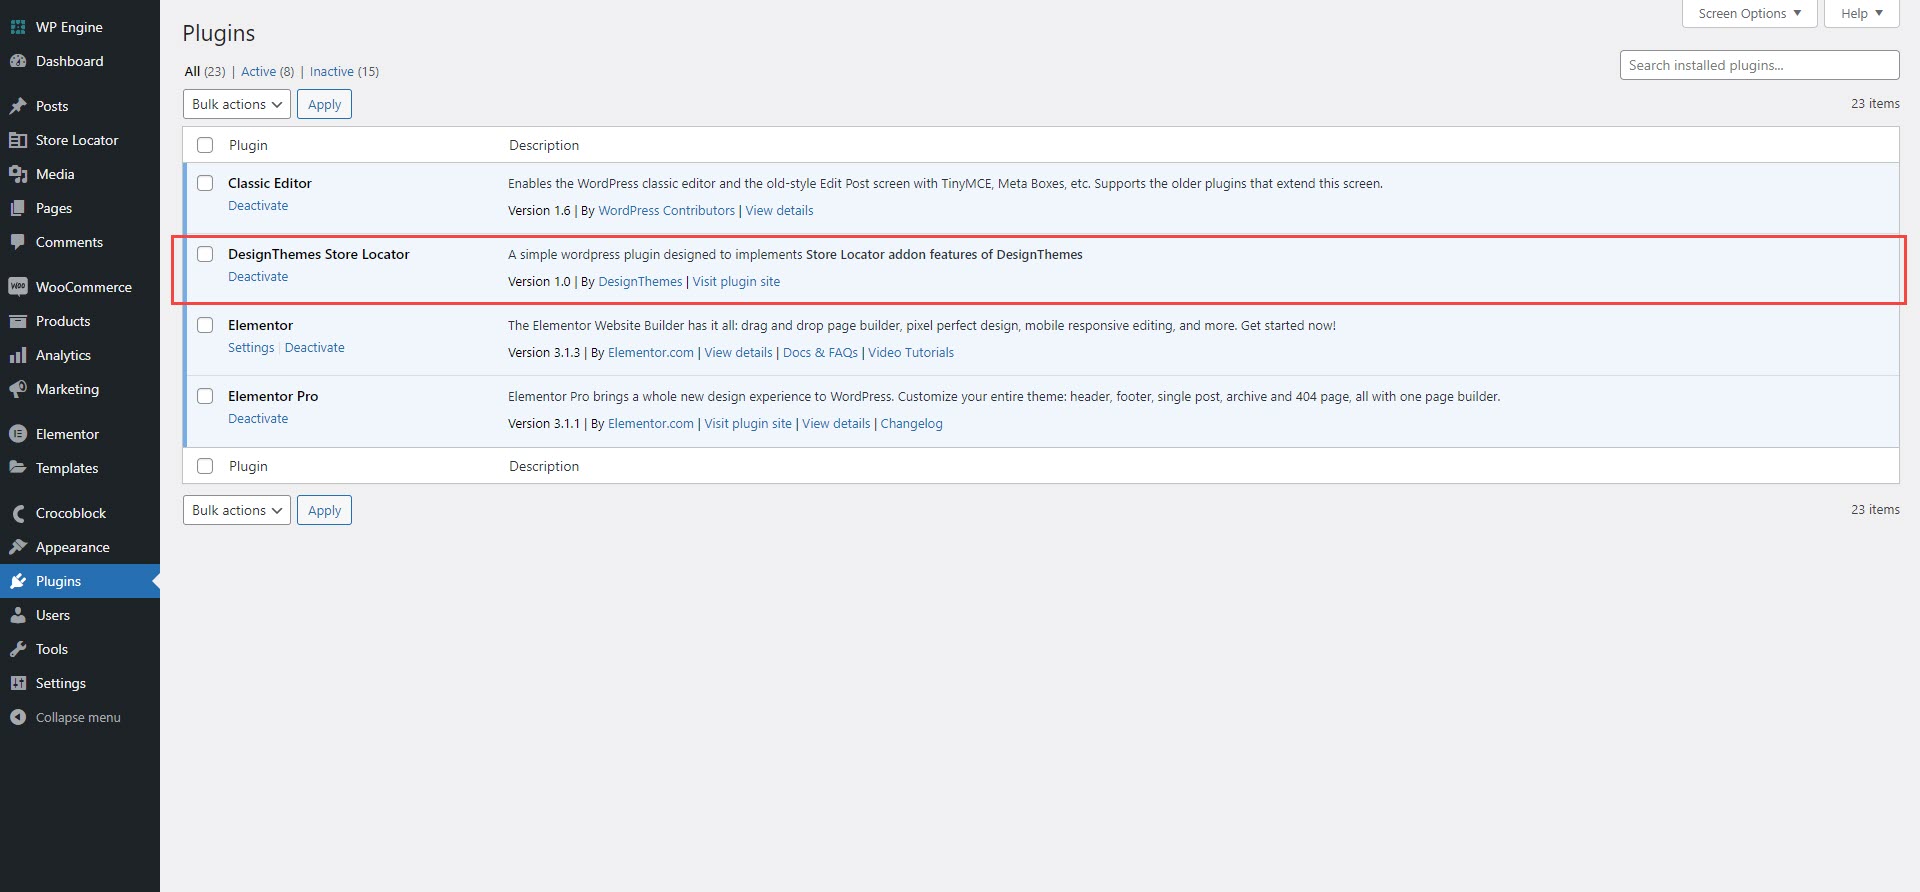
After installing the dt-storelocator.zip file successfully you will see like this in the dashboard. Click Active link to active Plugin.

Save Permalink: After installing the plugin successfully. Change the permalink from dashboard settings > permalinks and set the permalink to post name. By default it's normally set to Day and name.
3 Import Sample/Demo Data
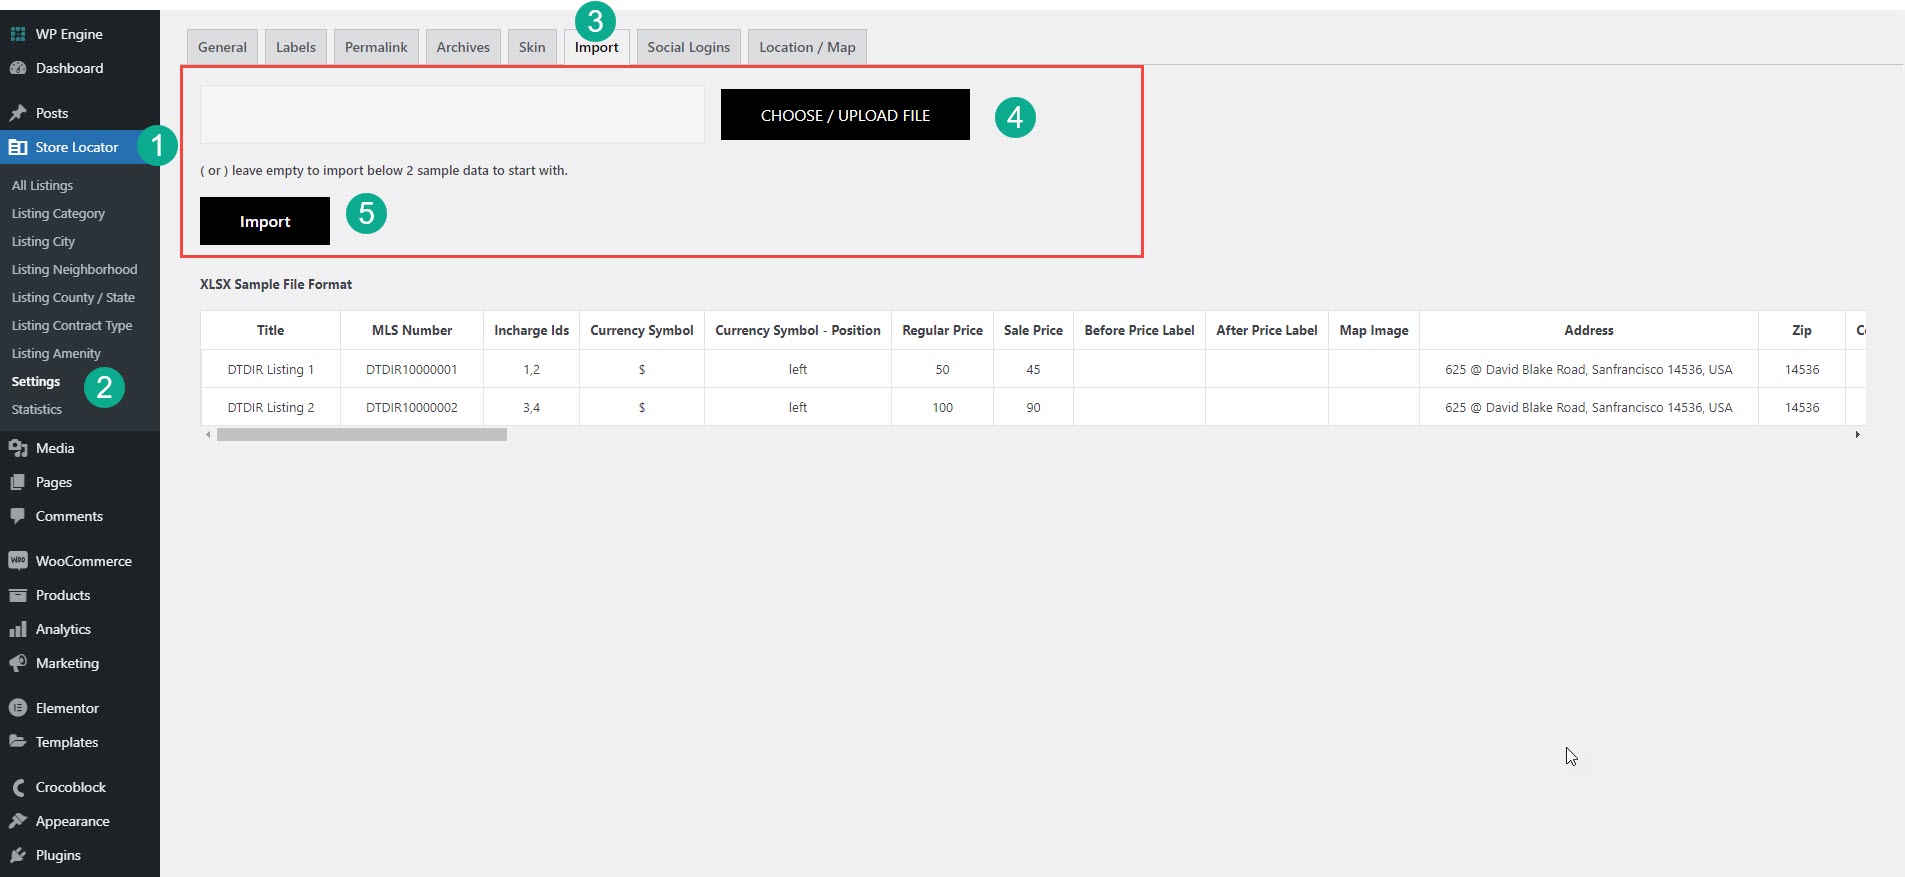
Store Locator has simple one click demo importer. When you will install storelocator-pro plugin.You will get a option in your admin dashboard called Store Locator Pro Just go to Store Locator >Settings.
Upload XLSX
If you want to import demo data through uploading the XLSX. You will get an option for UPLOAD XLSX FILE beside the Demo Import.
Below that section you will get an option called SAMPLE XLSX FILE. Download the file and then click on UPLOAD XLSX FILE button and select the downloaded file form your computer. And then click on the RUN THE IMPORTER when the progress bar in 100% filled the file will be uploaded successfully.
4 Store Locator Settings
This is the main configuration page for the storelocator for setting your site as the storelocator listing site.
The Store Locator → Settings section is where all of the key Business Store Locator configuration options are entered, edited and maintained. You will spend some time learning about all of the options available, as plugin is highly configurable and lots of options are available to control what you users can see and do.
The Settings are comprised of the following “tabs” that are visible on the right once you click Store Locator → Settings. It looks like this when you first install the plugin:
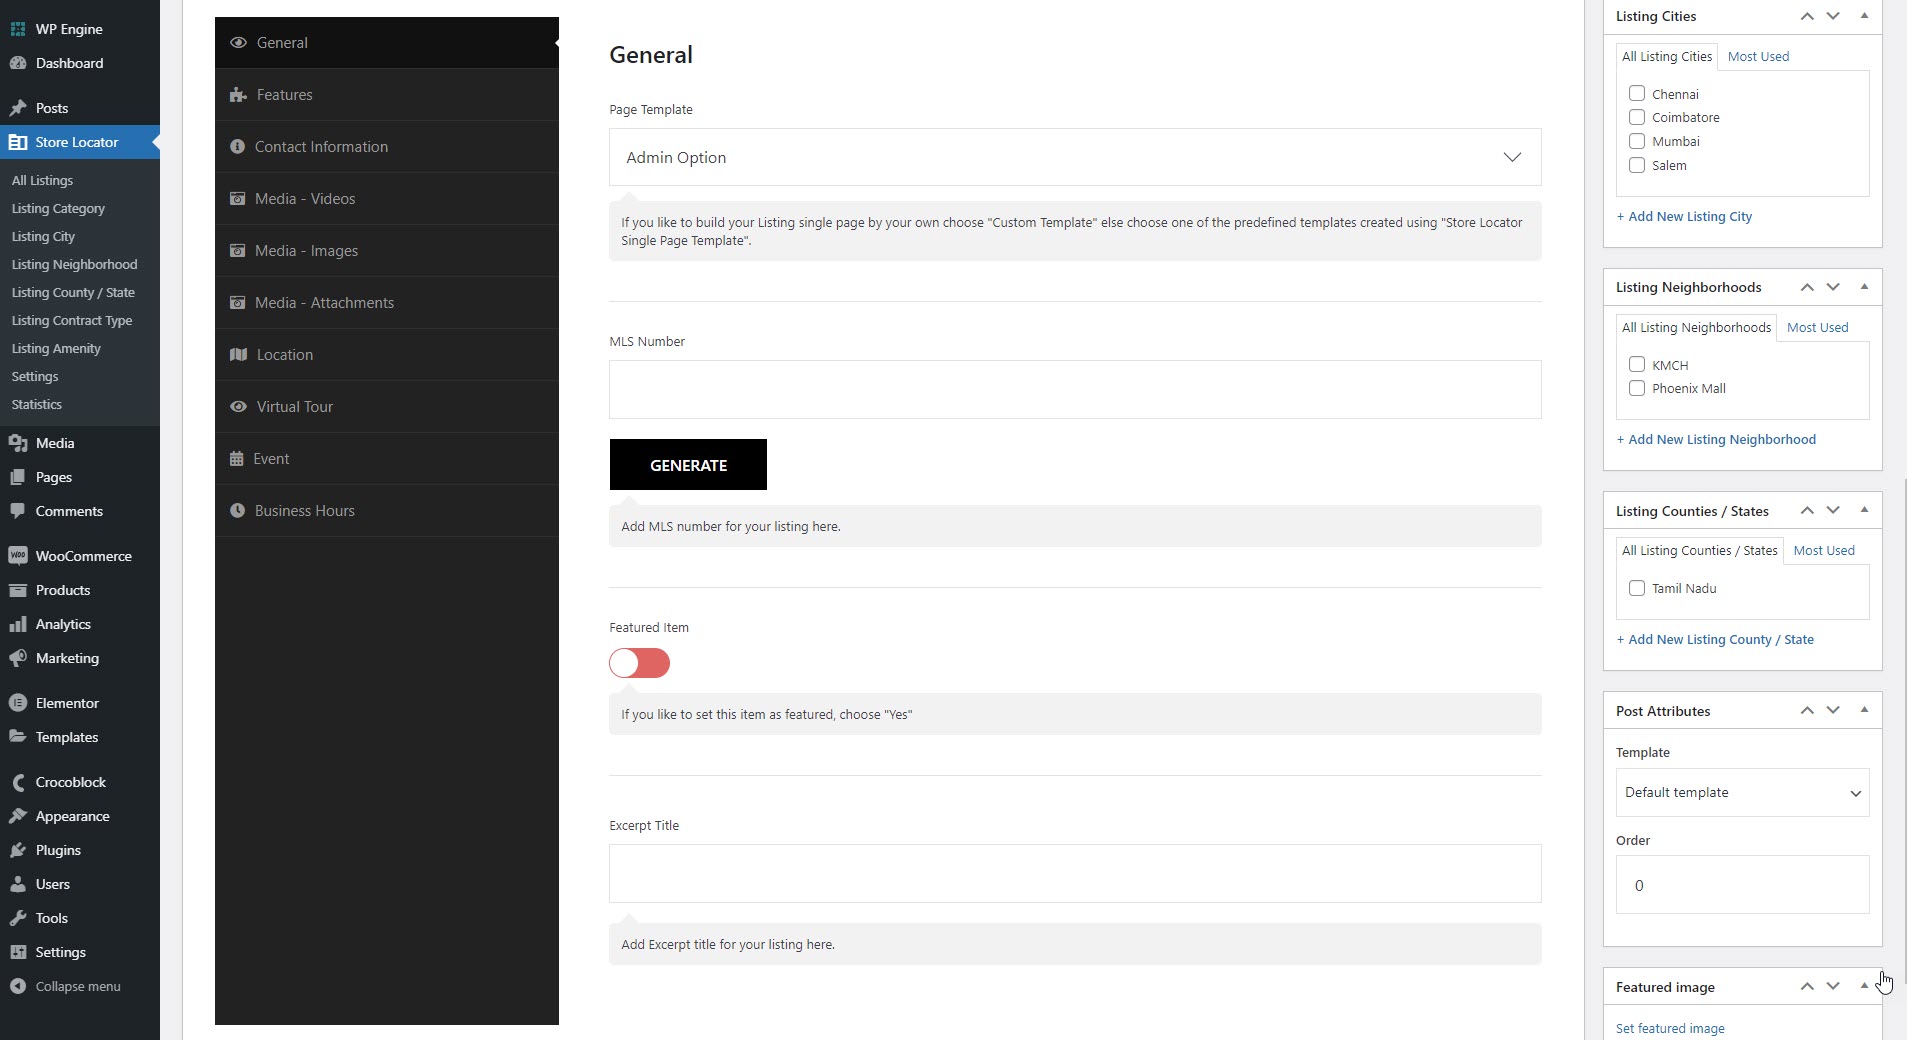
General
In this section, you can configure all the general settings related to the plugin.First of all, you have to create a page named storelocator listing and storelocator dashboard so that you can choose them in option, you also can add templetes, and some other general configurations.
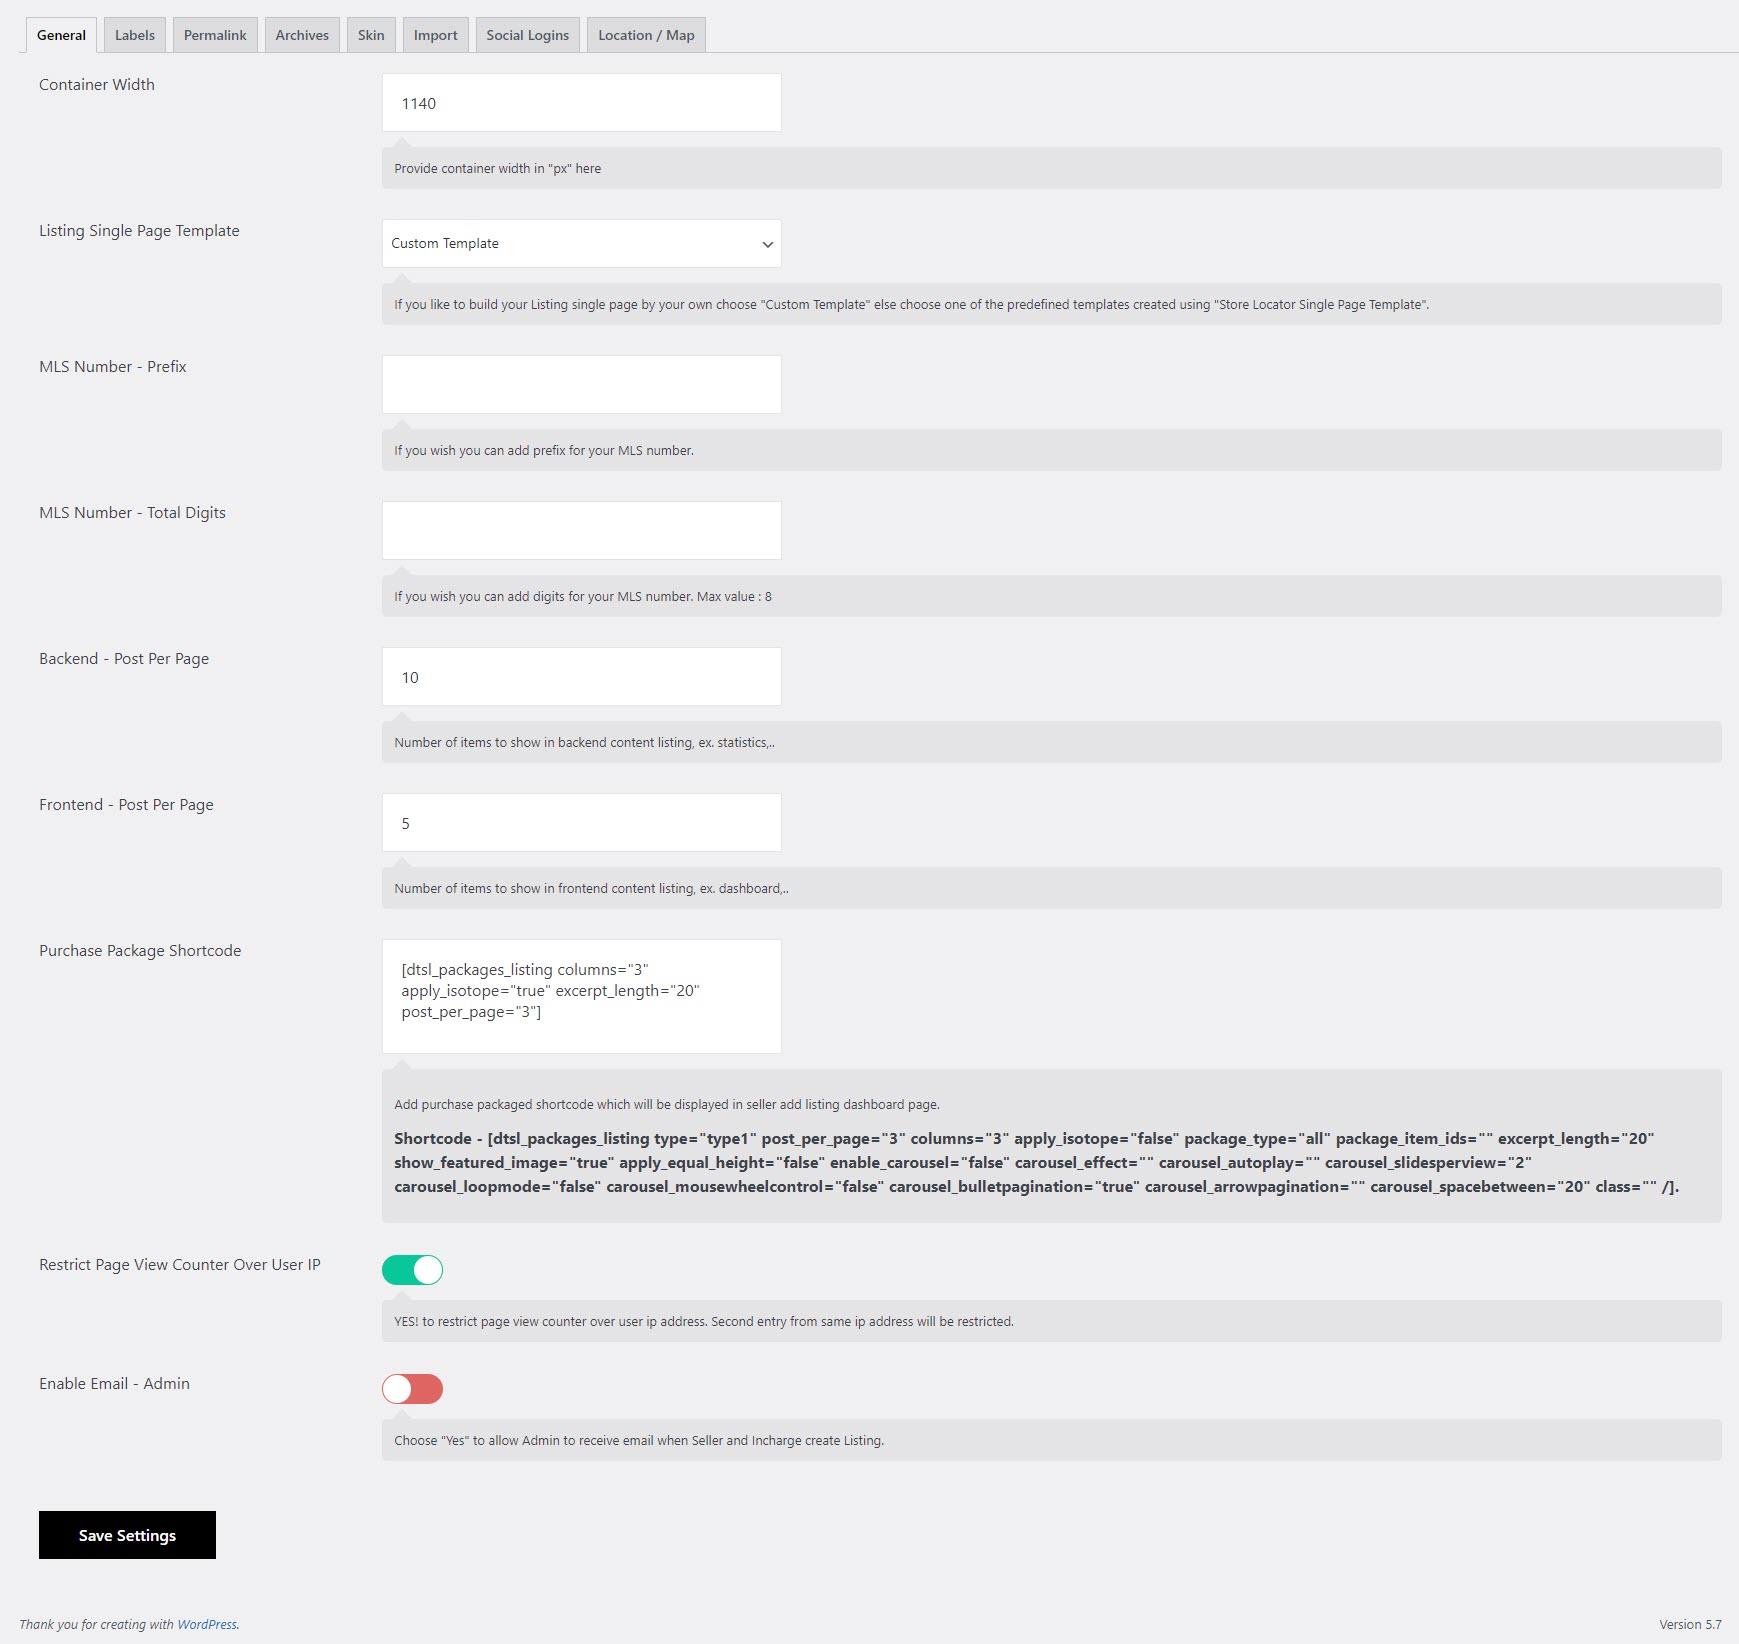
Container Width : This field shows you to display the storelocator in a grid layout width.
Listing Single Page Template : If you like to build your Listing single page by your own choose "Custom Template" else choose one of the predefined templates created using "Store Locator Single Page Template".
MLS Number – Prefix : If you wish you can add prefix for your MLS number.
MLS Number - Total Digits : If you wish you can add digits for your MLS number. Max value : 8
Backend - Post Per Page : Number of items to show in backend content listing, ex. statistics,..
Frontend - Post Per Page : Number of items to show in frontend content listing, ex. dashboard,..
Purchase Package Shortcode :
Shortcode - [dtsl_packages_listing type="type1" post_per_page="3" columns="3" apply_isotope="false" package_type="all" package_item_ids="" excerpt_length="20" show_featured_image="true" apply_equal_height="false" enable_carousel="false" carousel_effect="" carousel_autoplay="" carousel_slidesperview="2" carousel_loopmode="false" carousel_mousewheelcontrol="false" carousel_bulletpagination="true" carousel_arrowpagination="" carousel_spacebetween="20" class="" /]Add purchase packaged shortcode which will be displayed in seller add listing dashboard page.
Restrict Page View Counter Over User IP : YES! to restrict page view counter over user ip address. Second entry from same ip address will be restricted.
Enable Email - Admin : Choose "Yes" to allow Admin to receive email when create Listing.
Labels
You can set the form by adding the given contents,You can also add the required option in the form, like, if the customer submitted the form without the required option then it would end to error, so if you add required option then the customer should fill the added required option to get the form submitted, You can also drag and drop and set its order and position
Listing Singular Label : You can replace the "Listing" label as per your requirement.
Listings Plural Label : You can replace the "Listings" label as per your requirement.
Contract Type Singular Label : You can replace the "Contract Type" label as per your requirement.
Contract Types Plural Label : You can replace the "Contract Types" label as per your requirement.
Amenity Singular Label : You can replace the "Amenity" label as per your requirement.
Amenities Plural Label : You can replace the "Amenities" label as per your requirement.

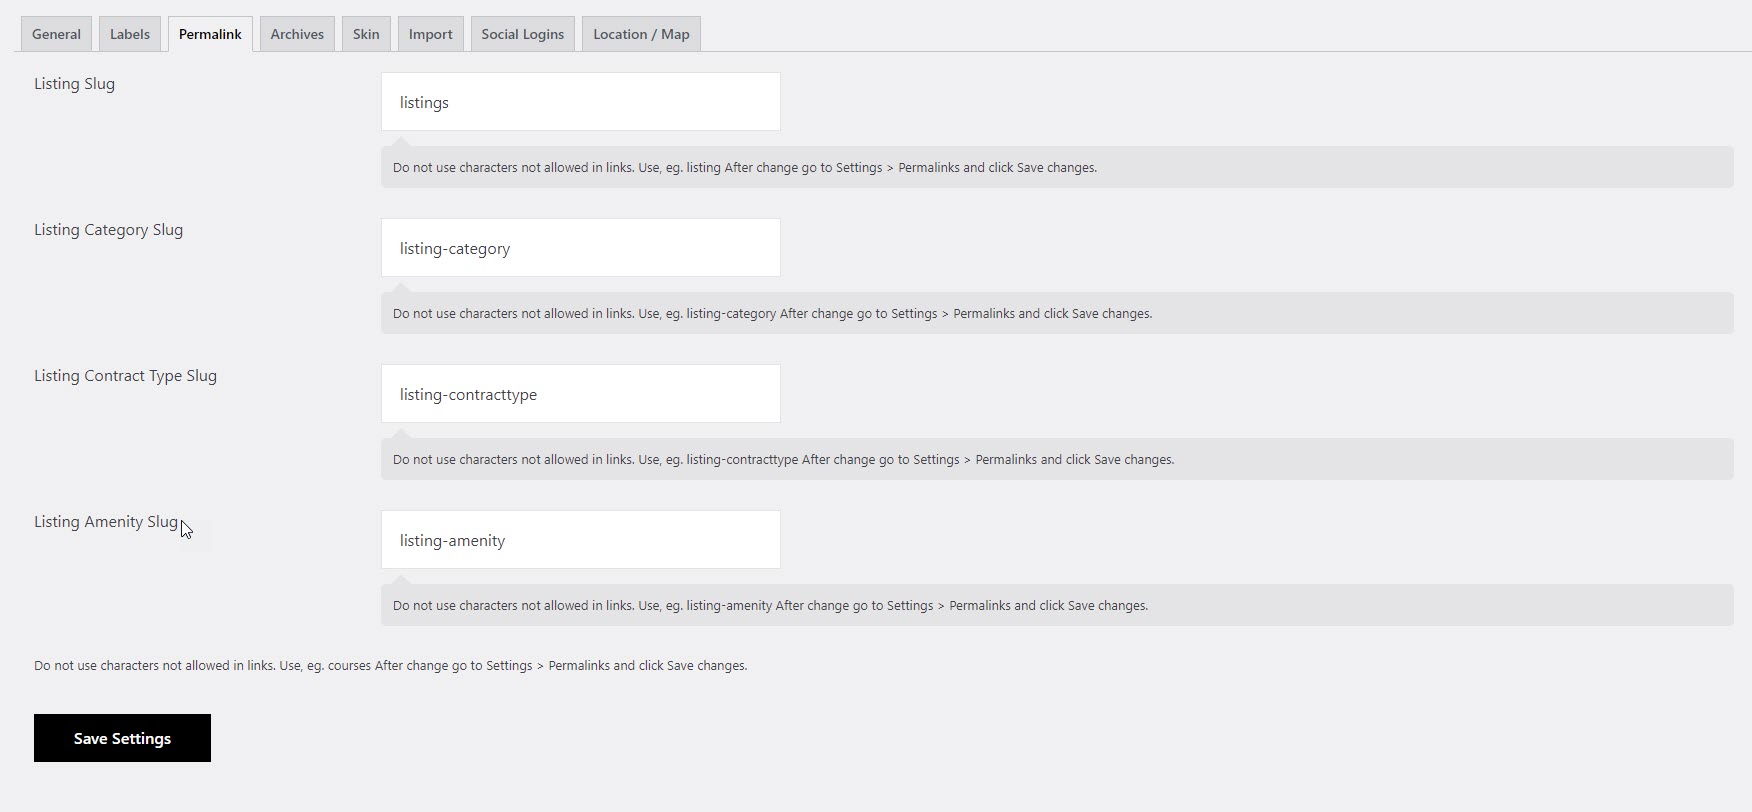
Permalinks
The Listing slug is the user friendly and URL valid name of a post. Most common usage of this feature is to create a permalink for each Listing . WordPress automatically generates Listing slugs from a Listing title. However, it is not used in the URL until custom permalinks are enabled for use ” %postname%” in the URL structure.
Archives
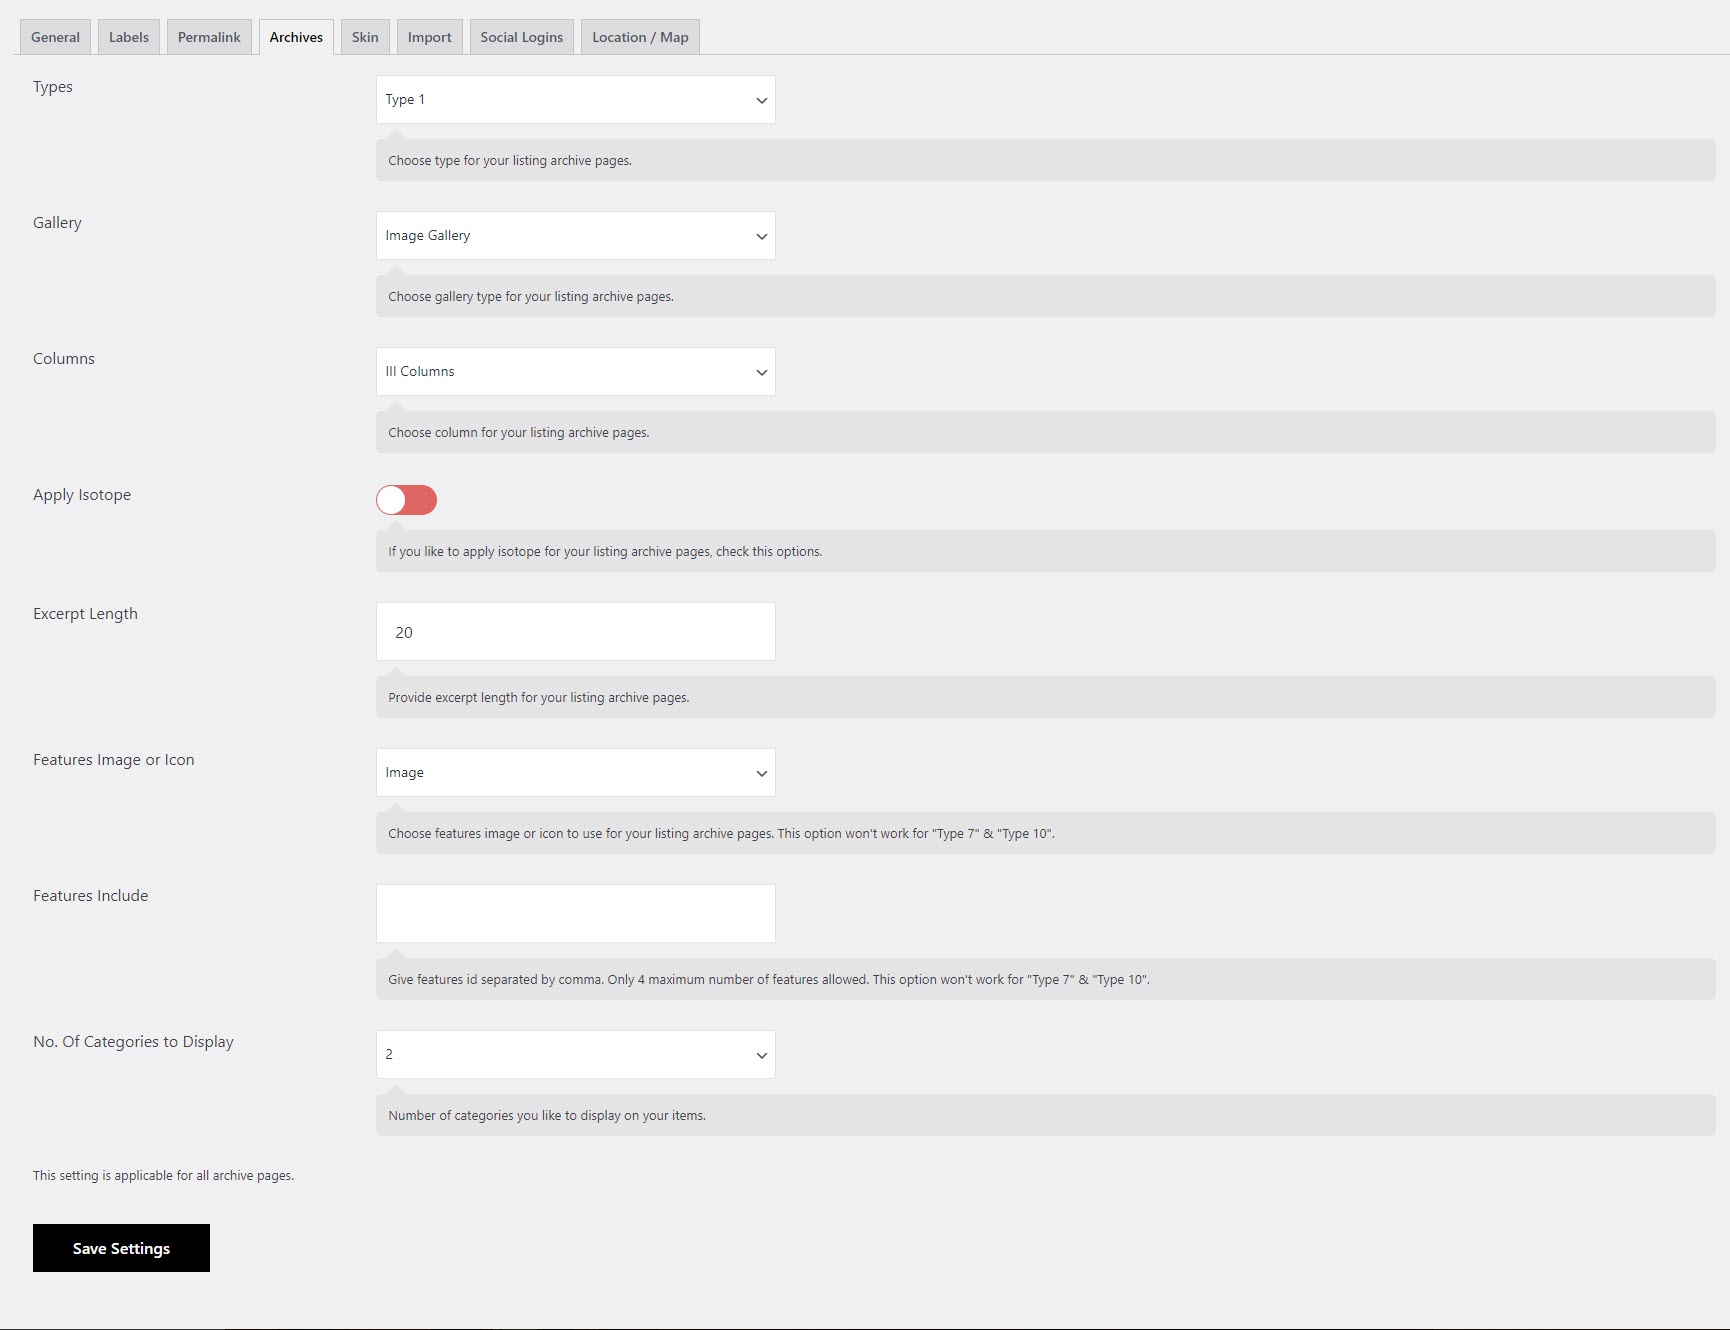
Custom archives page is a great way to bring together all your old content in one page. It allows you to have a dedicated page where you can list your archives, category archives, tag archives, author archives, and anything else that you might want to add.
Types : Choose type for your listing archive pages.
Gallery : Choose gallery type for your listing archive pages.
Columns : Choose column for your listing archive pages.
Apply Isotope : If you like to apply isotope for your listing archive pages, check this options.
Excerpt Length : Provide excerpt length for your listing archive pages.
Features Image or Icon : Choose features image or icon to use for your listing archive pages. This option won't work for "Type 7" & "Type 10".
Features Include : Give features id separated by comma. Only 4 maximum number of features allowed. This option won't work for "Type 7" & "Type 10".
No. Of Categories to Display : Number of categories you like to display on your items.
Note: This setting is applicable for all archive pages.
Skins
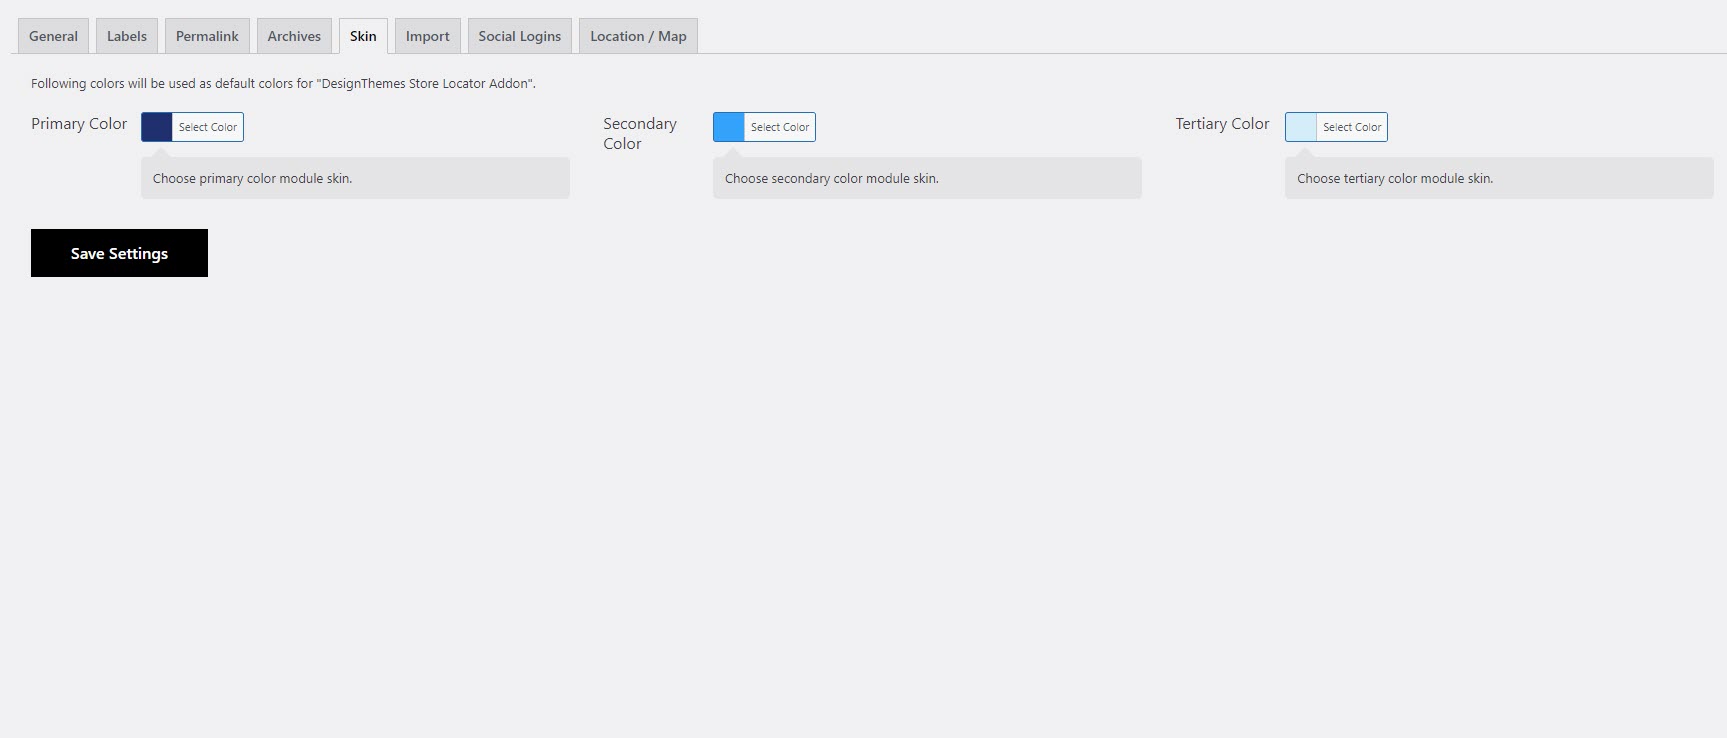
Following colors will be used as default colors for "DesignThemes Store Locator Addon".
Primary Color : Choose primary color module skin.
Secondary Color : Choose secondary color module skin.
Tertiary Color : Choose tertiary color module skin.
Skin : Personalizing the site with your brand colors is an important part of web developing, creating you own skin by changing the main colors can be achieved through the Theme Options with color pickers.
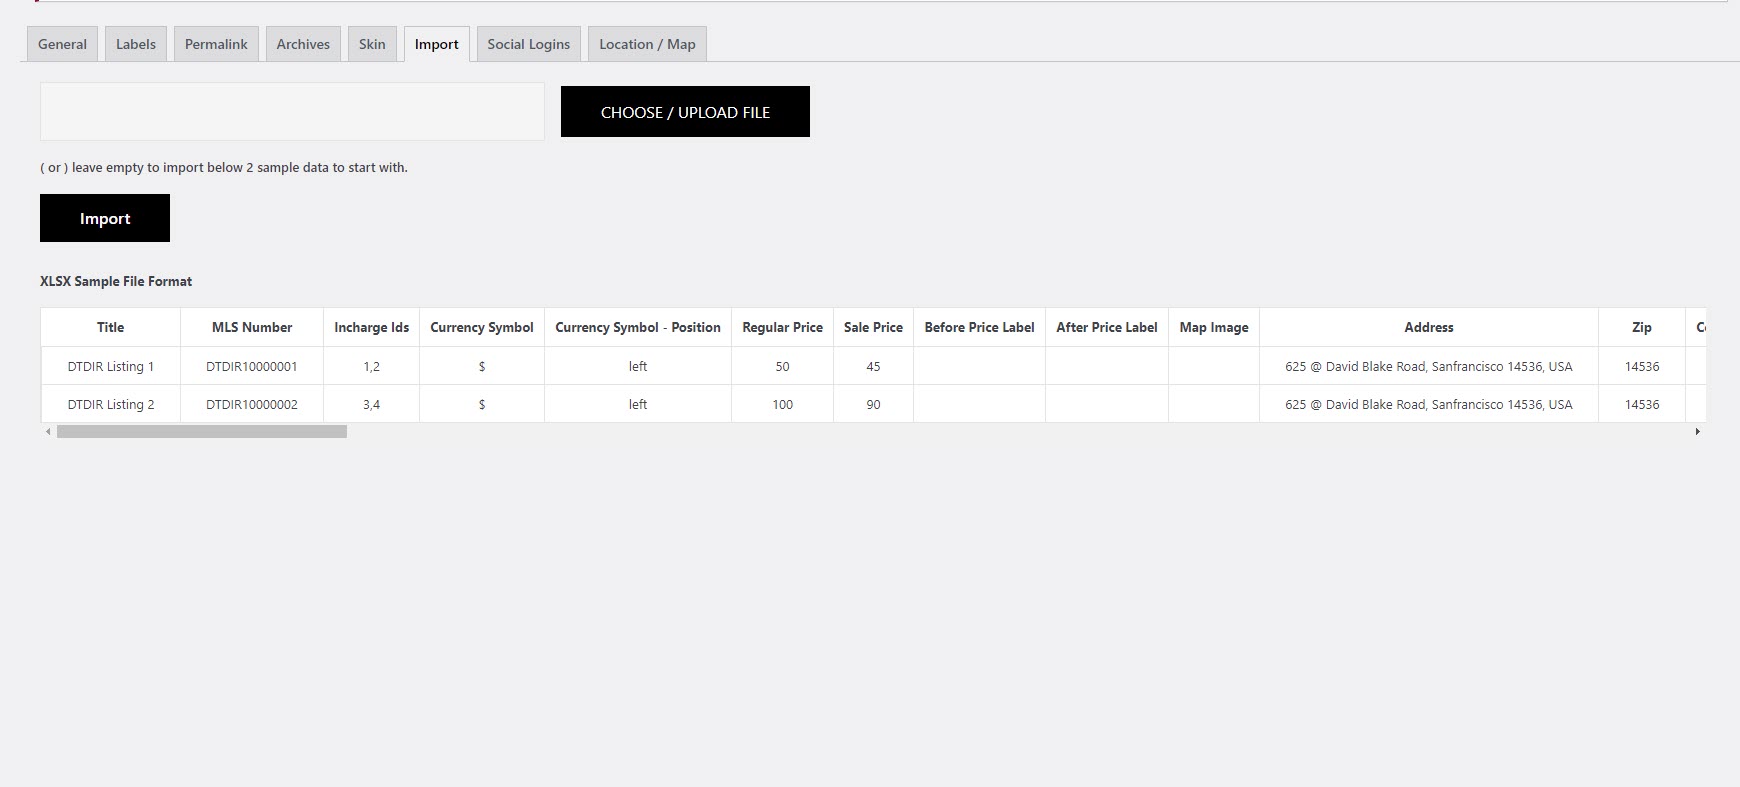
Import
Store Locator has simple one click demo importer. When you will install storelocator-pro plugin.You will get a option in your admin dashboard called Store Locator Pro Just go to Store Locator >Settings.
Upload XLSX
If you want to import demo data through uploading the XLSX. You will get an option for UPLOAD XLSX FILE beside the Demo Import.
Below that section you will get an option called SAMPLE XLSX FILE. Download the file and then click on UPLOAD XLSX FILE button and select the downloaded file form your computer. And then click on the RUN THE IMPORTER when the progress bar in 100% filled the file will be uploaded successfully.
Social Logins
Store Locator Social Information : You can use social media to show all the information via URL.
It contains URL like Facebook, App Id, Google Login

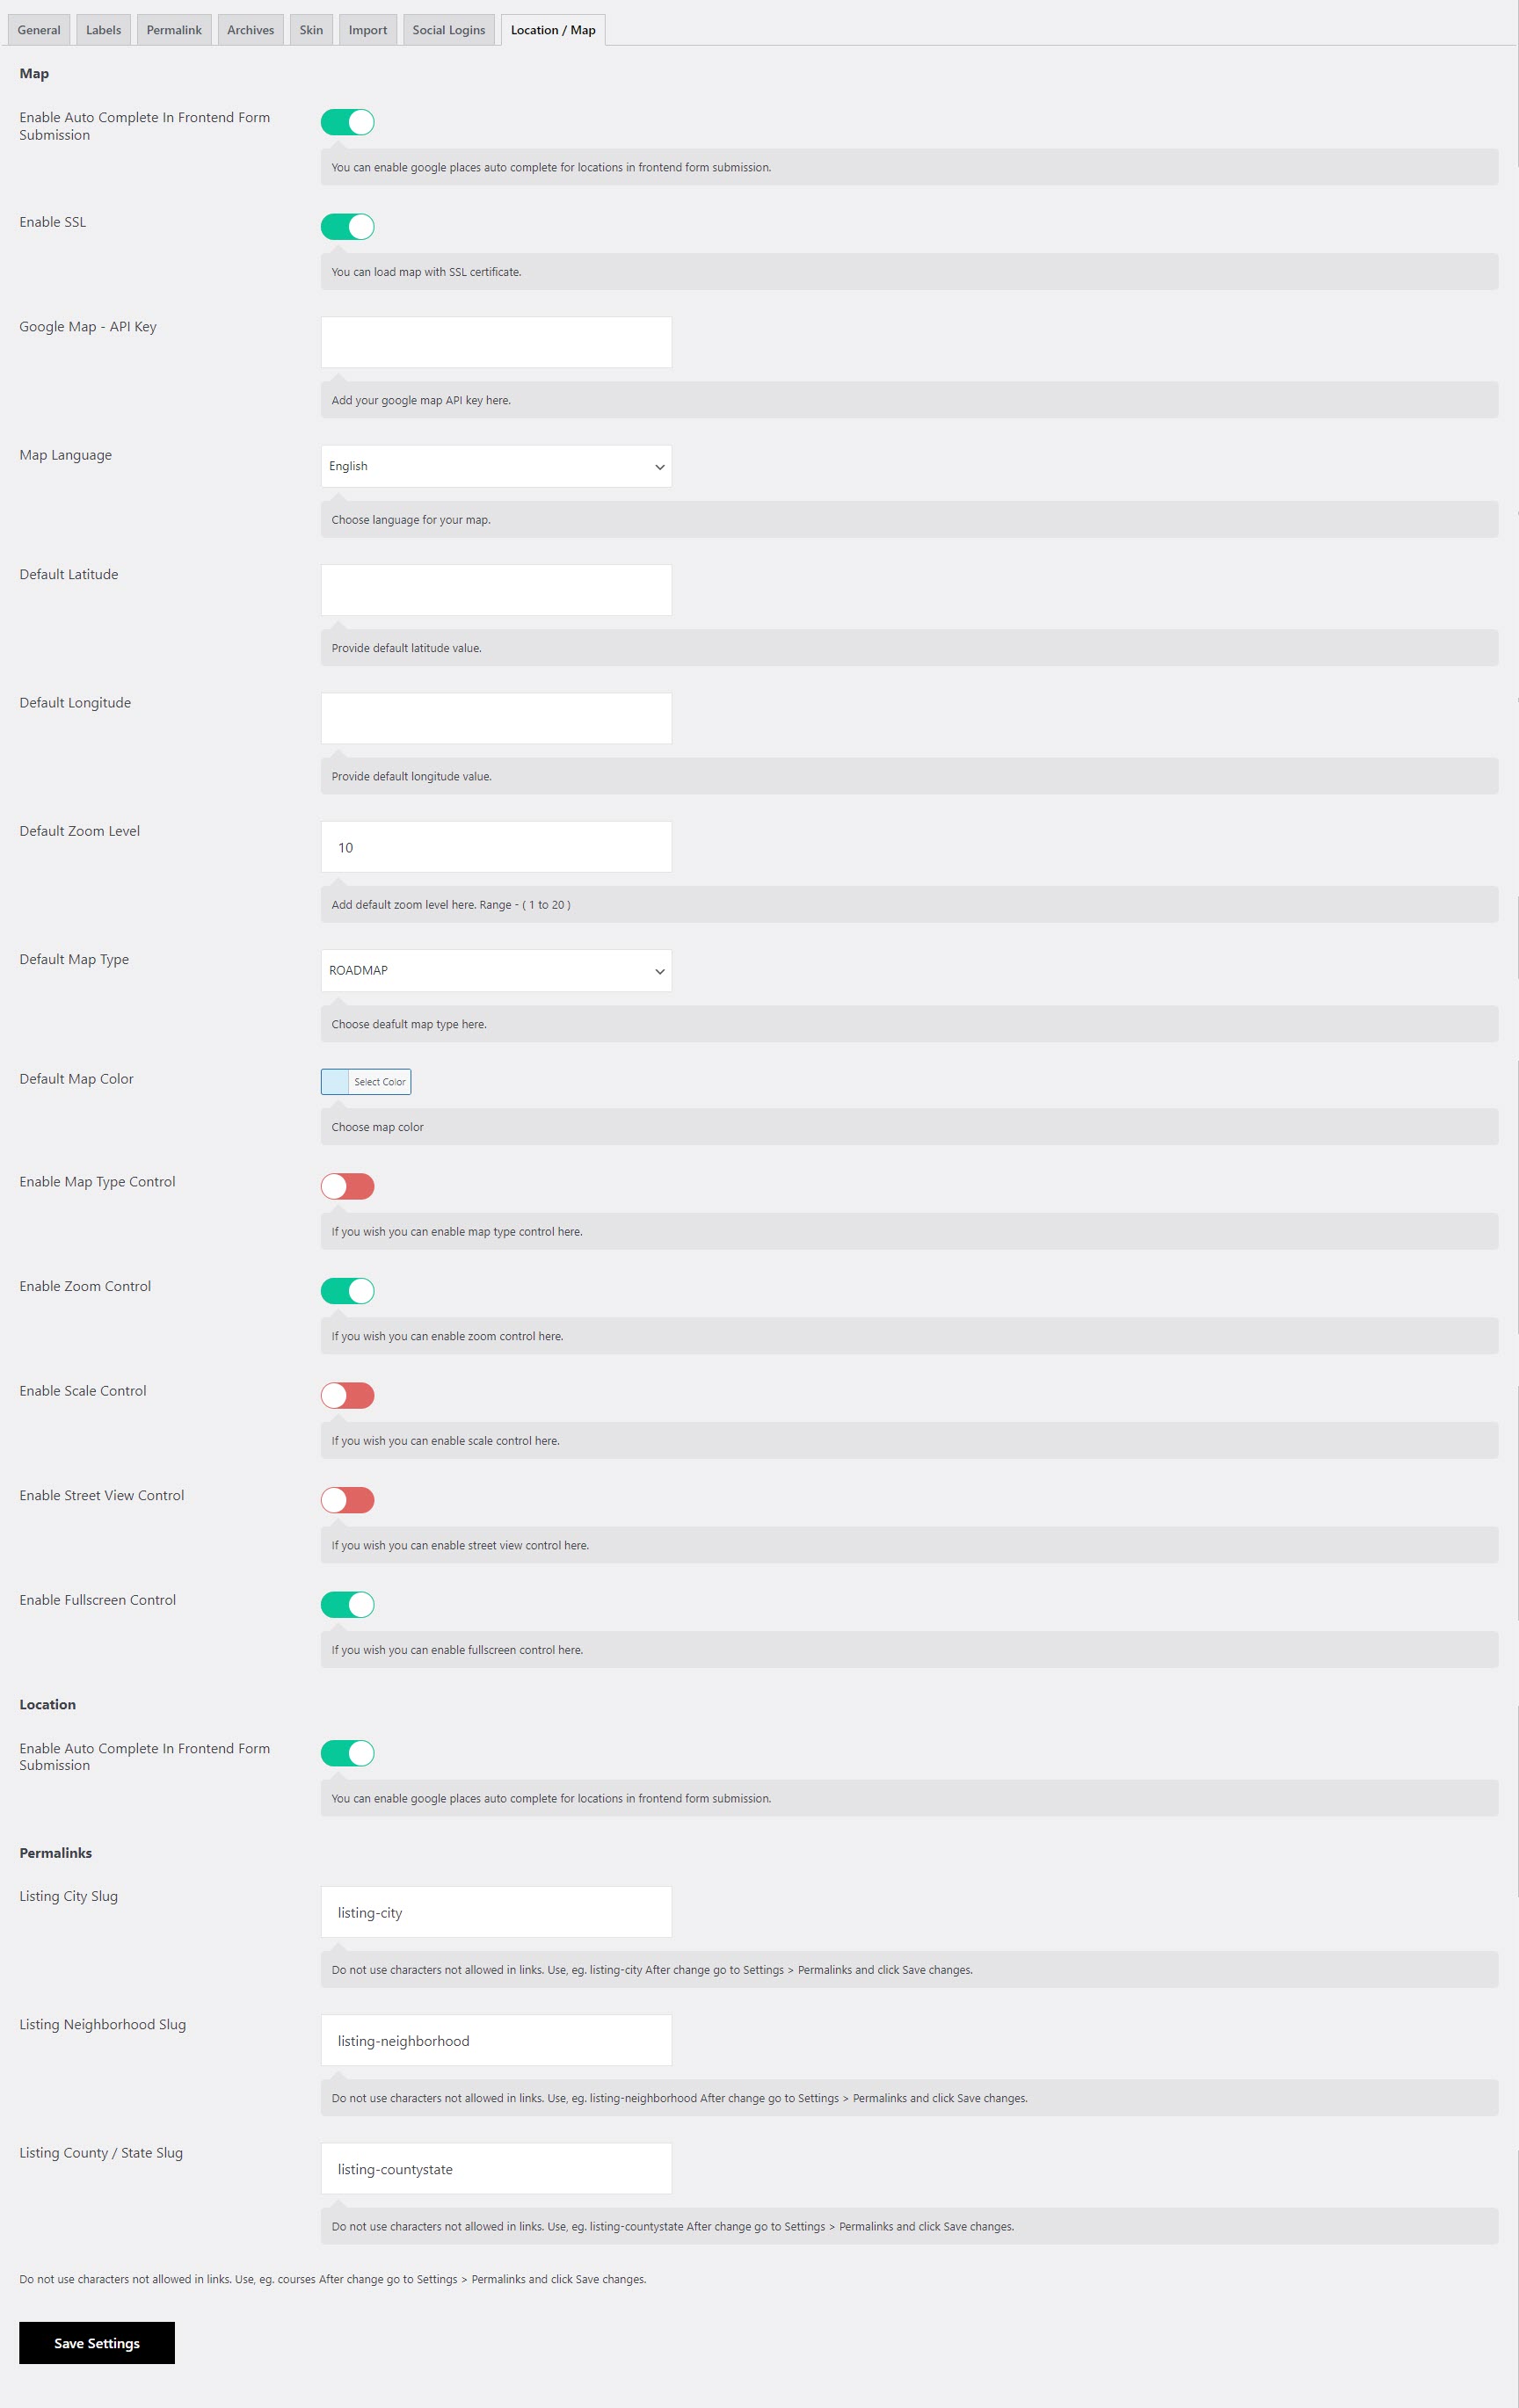
Location / Map
Store Locator Location Information : This option provides you the ability to show your location. You just need to add the address and click on plot map button to search the location. You can also use manually update the value to find the location.
5Configuration of Google Account
How to Generate the API Key
For your Google Maps to display on your page, you now need to use either the Google Maps JavaScript or Embed API, and for both, you need an API key. To generate a new API key, please click the button below for Google’s ‘Get A Key/Authentication’ article. Please read it carefully as there are different methods for Standard API users and Premium Plan users. Please also note that you need to enable billing with a credit card when creating an API Key. Read the information about Google Maps Platform Pricing Plan below
Step 1 : Add your Google Maps API key to WordPress
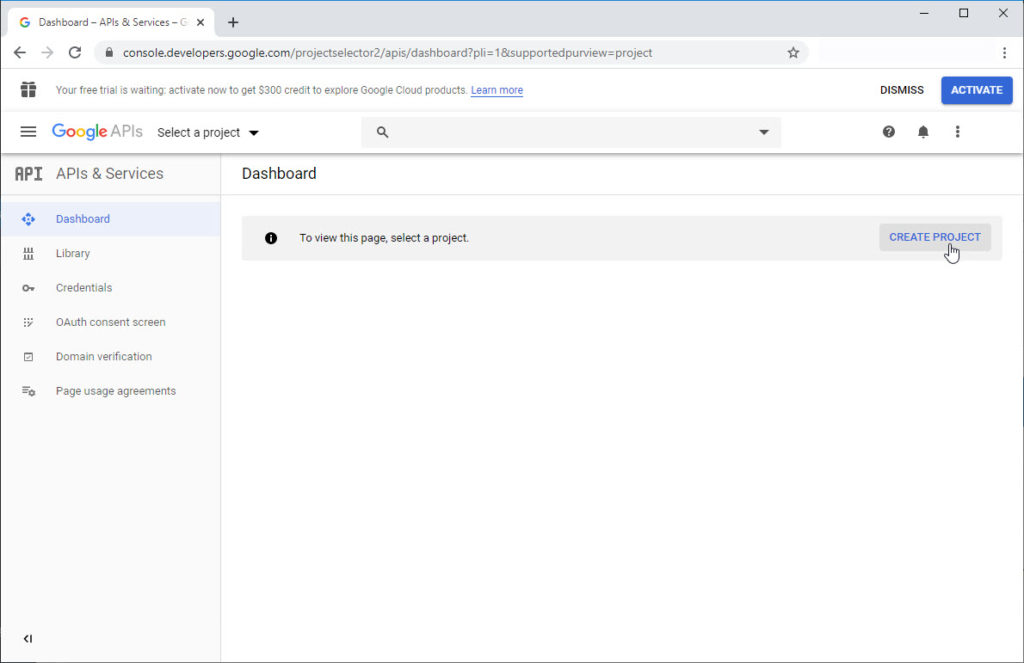
To get this key, visit the Google APIs Dashboard. Assuming you already have a Google account, you should be able to access this dashboard without needing to sign up for anything.
Inside the Google APIs dashboard, select the blue Create Project button near the top of the page:
Choose Create on the next screen. Then, you’ll be able to pick a name for your project:
Click on Create once more, and you’ll be taken back to the dashboard. Select Enable APIs and Services near the top of the screen and search the API Library for “Google Maps JavaScript API”. Once you’ve found it, select Enable:

On the next screen, click on the Create Credentials button in the top-right corner.
Then on the next page, select What credentials do I need? You’ll be presented with an API key, which you can now copy.
Return to your WordPress site and select the link in Please add an API Key here.
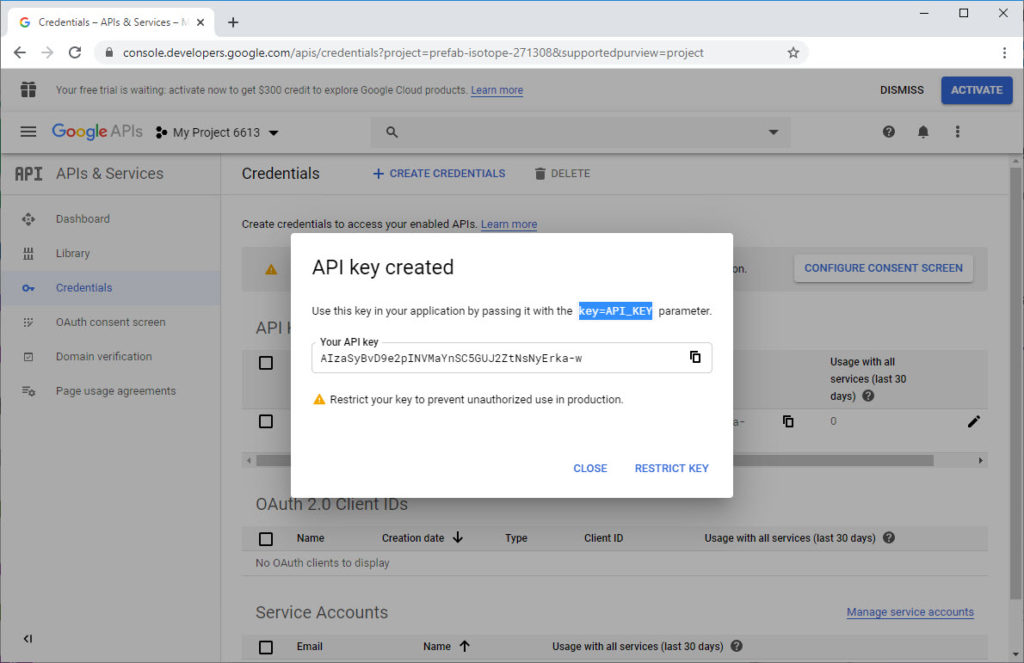
Step 2 : Where To Add API Key
Capture the API Key that’s generated and add it to the plugin field in your WordPress Admin (Dashboard) > Store Locator > Settings > Location / Map

6Admin Options
6.1Listings
Store Locator listings are very much like standard WordPress posts, except some things and additional features. In wordpress terminology "Store Locator listings" are posts of custom post type, they store in the database, in wordpress tables with all their meta data.
You have full control over the listing fields. You can edit or delete the existing listing field. You can also add new listing field. To edit or delete the existing listing field just go to Dashboard > Store Locator > Settings > Listing Fields
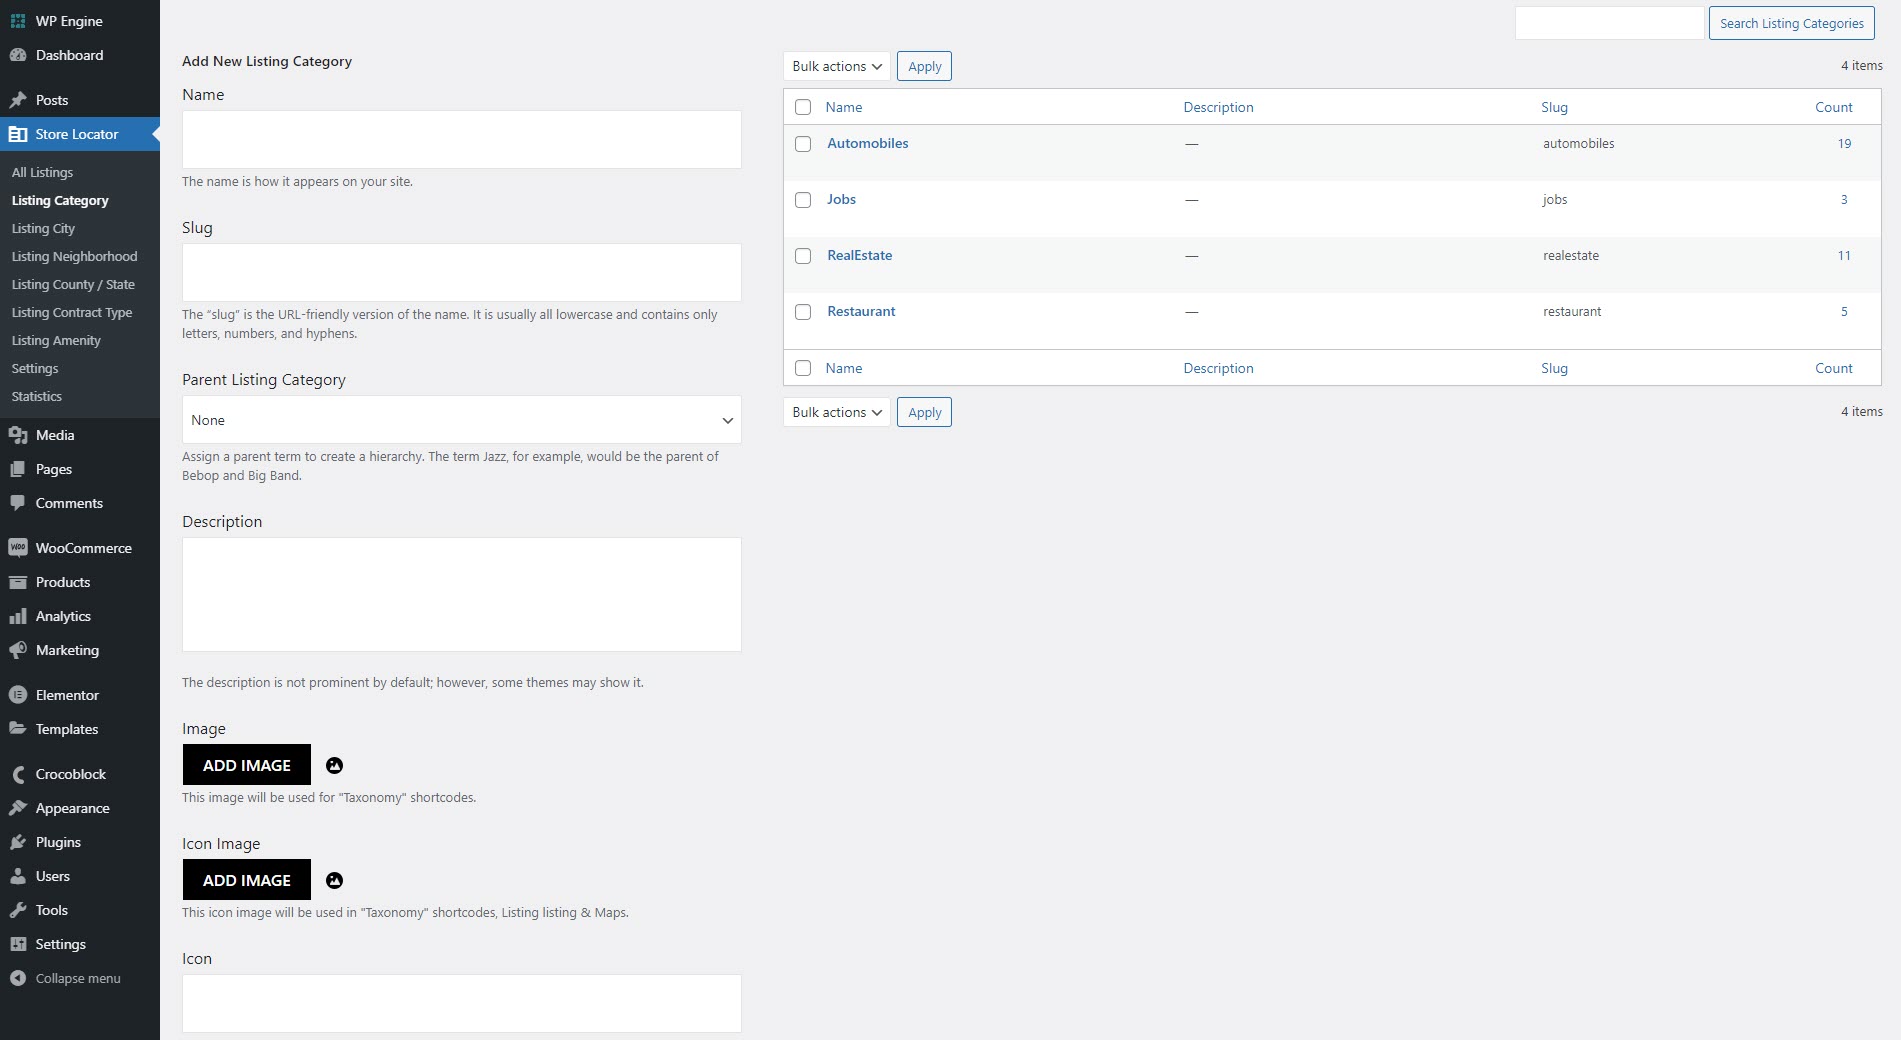
6.2Category
Categories and tags in Directories are used to organize listings into groups, just like categories and tags you have when writing posts in WordPress.
Step 1 :Login to your website if not yet logged in and go to the WordPress administration dashboard.
Step 2 :Select Store Locator > Categories under your directory menu in the admin sidebar.
Step 3 :To add a category, use the Add Category form displayed next to the category list table
Step 4 :Name, Slug, Parent Category, Description - Enter these fields as you do with categories for posts in WordPress.
Step 5 :Category Color, Category Icon - Select an icon and a color that best represents the category.
Step 6 :Click the Add Category button to add your category.
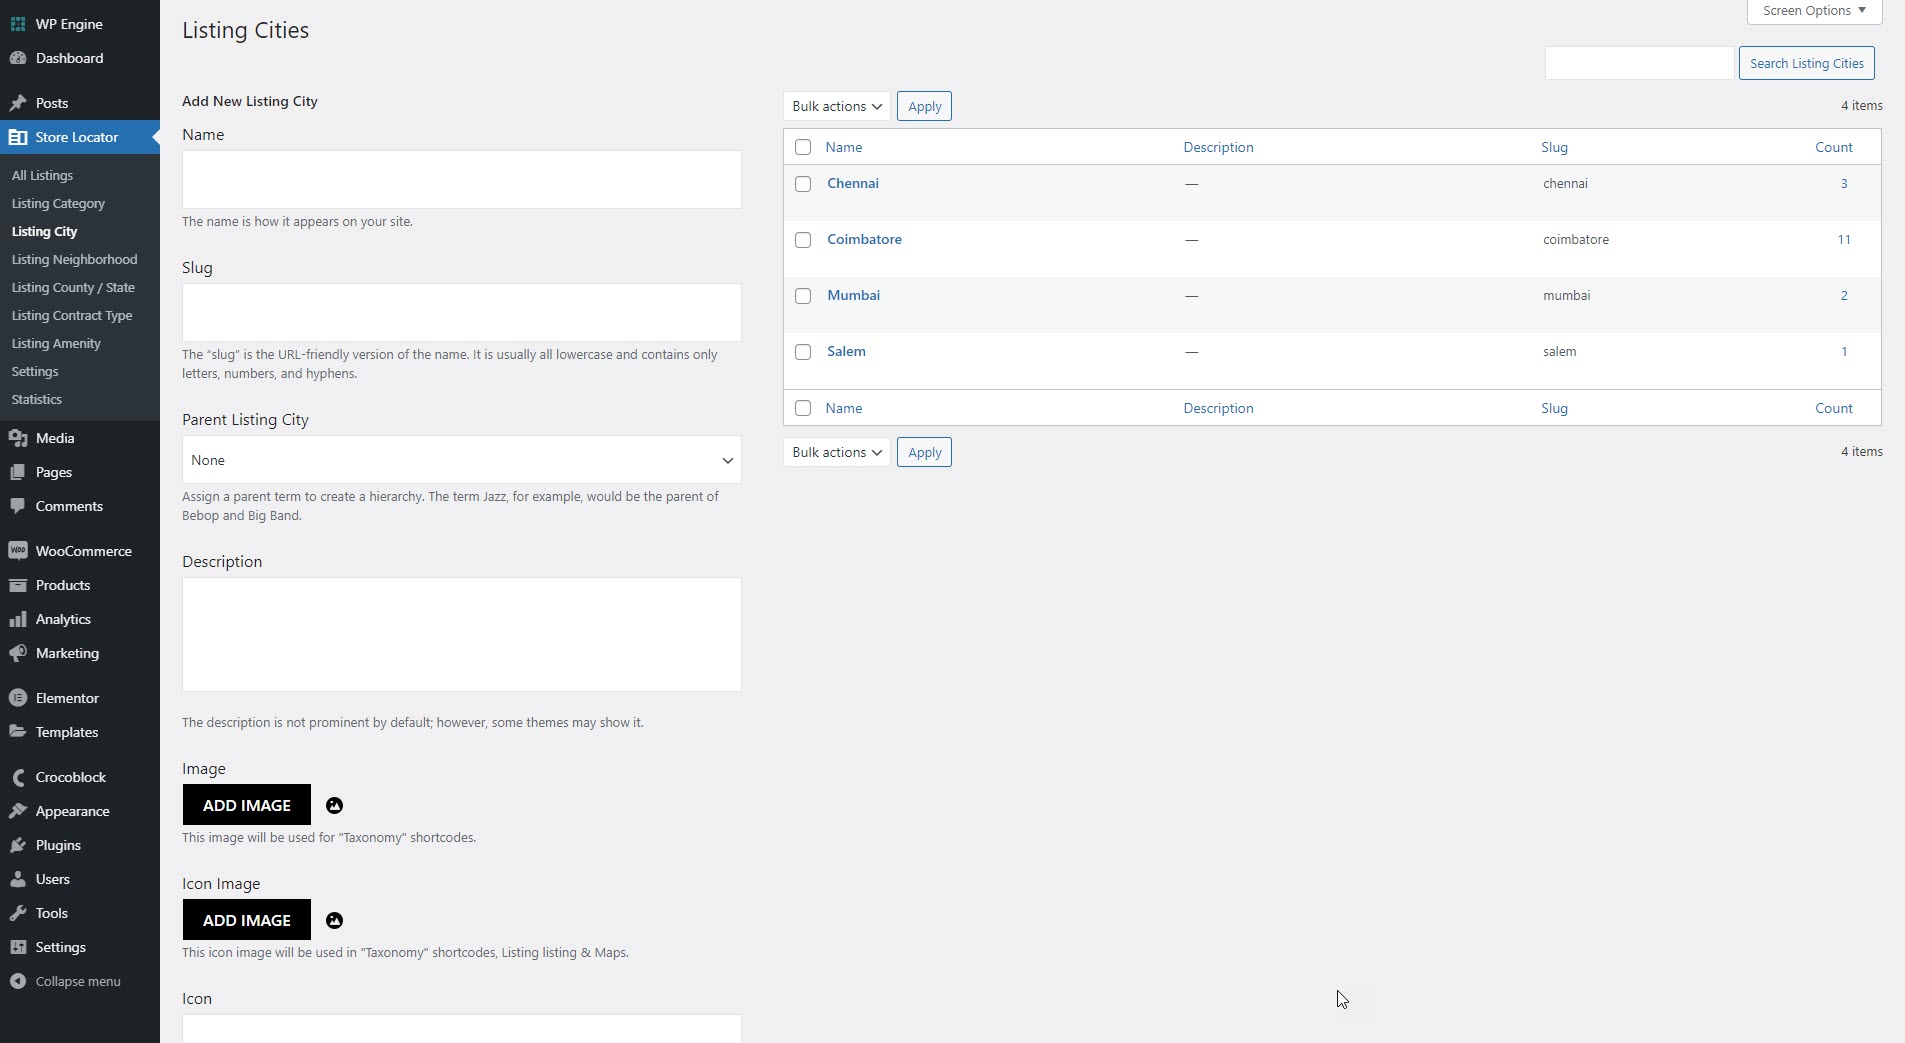
6.3City
Locations let you group listings geographically, such as by countries, states, and/or cities. Locations is a custom taxonomy and are hierarchical in structure just like categories.
Step 1 :Follow the steps below to add a City location to your directory.
Step 2 :Login to your website if not yet logged in and go to the WordPress administration dashboard.
Step 3 :Select Locations under your directory menu in the admin sidebar.
Step 4 :Use the Add Location form displayed next to the location list table. Enter the Name of location and then optionally fill out the Slug and Description fields, select a Parent Location and/or upload a photo for the location from the Photo field.
Step 5 :Click the Add Location button to add your location.
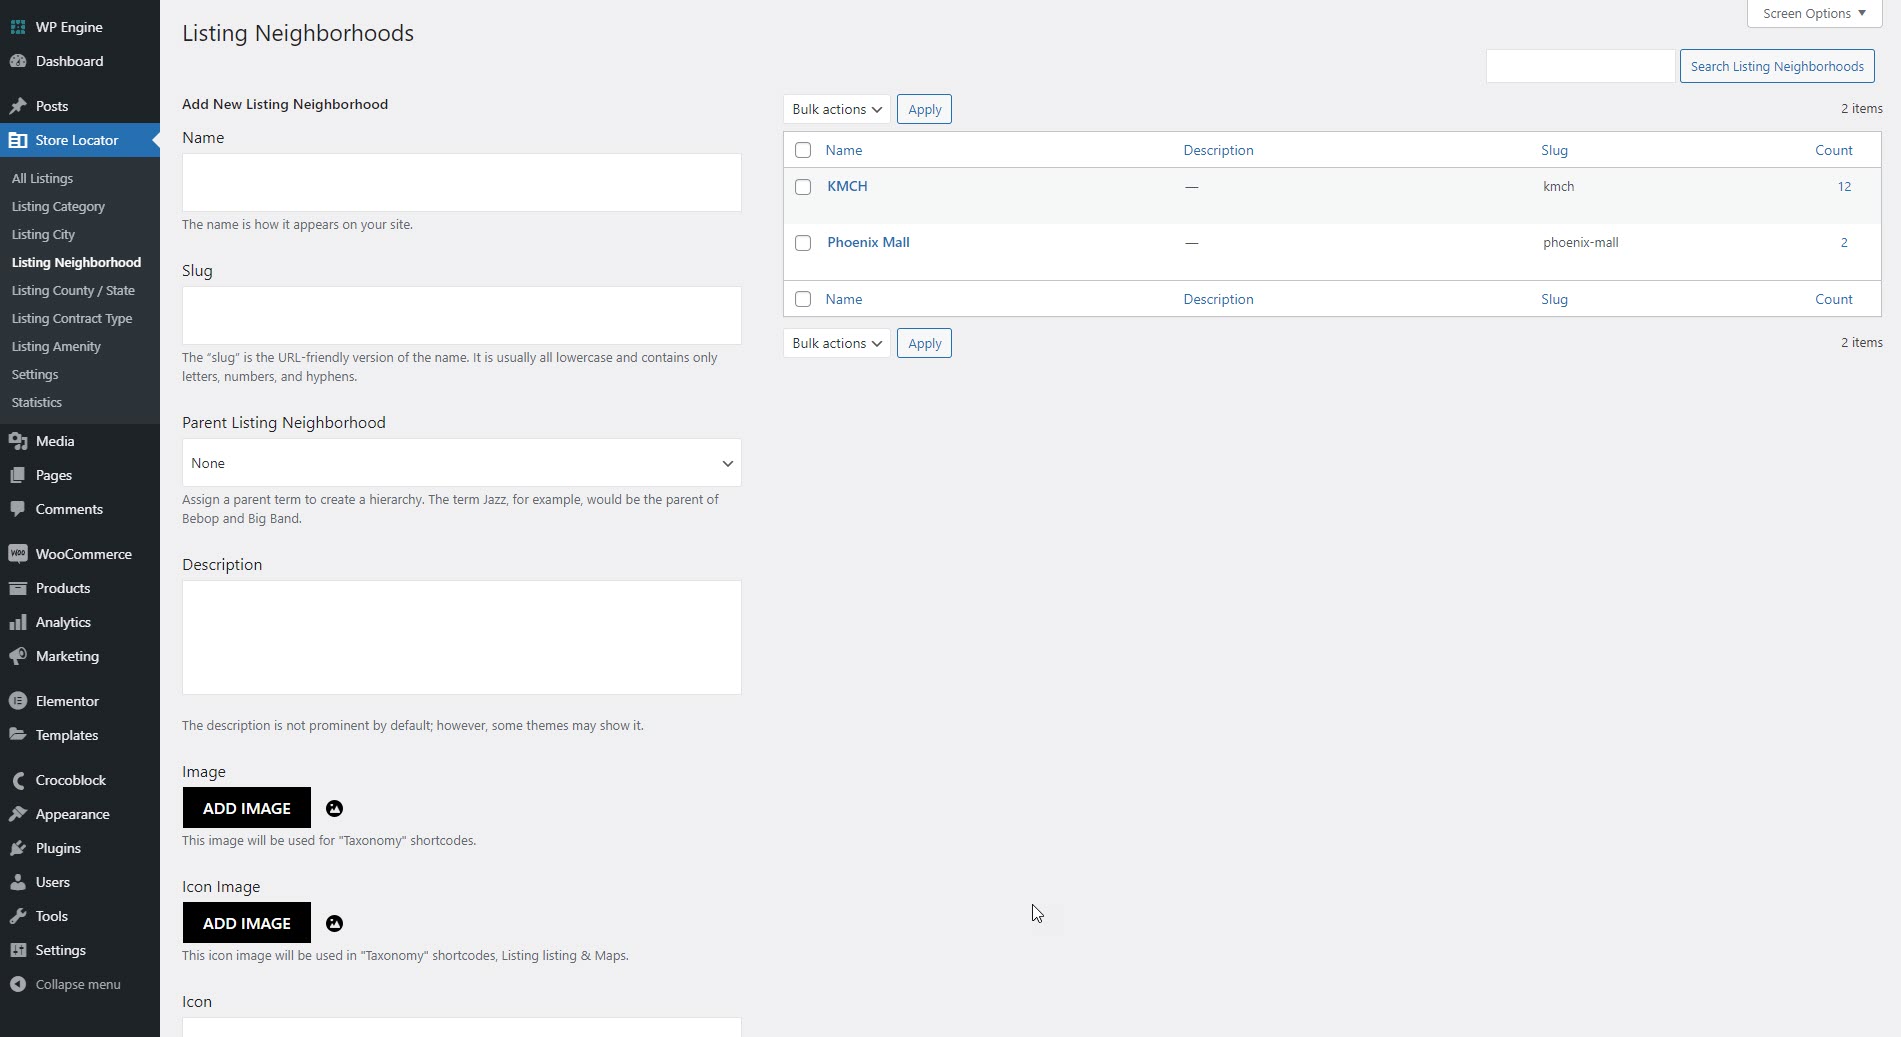
6.4Neighborhood
Locations let you group listings geographically, such as by countries, states, and/or cities. Locations is a custom taxonomy and are hierarchical in structure just like categories.
Step 1 :Follow the steps below to add a Neighborhood location to your directory.
Step 2 :Login to your website if not yet logged in and go to the WordPress administration dashboard.
Step 3 :Select Locations under your directory menu in the admin sidebar.
Step 4 :Use the Add Location form displayed next to the location list table. Enter the Name of location and then optionally fill out the Slug and Description fields, select a Parent Location and/or upload a photo for the location from the Photo field.
Step 5 :Click the Add Location button to add your location.
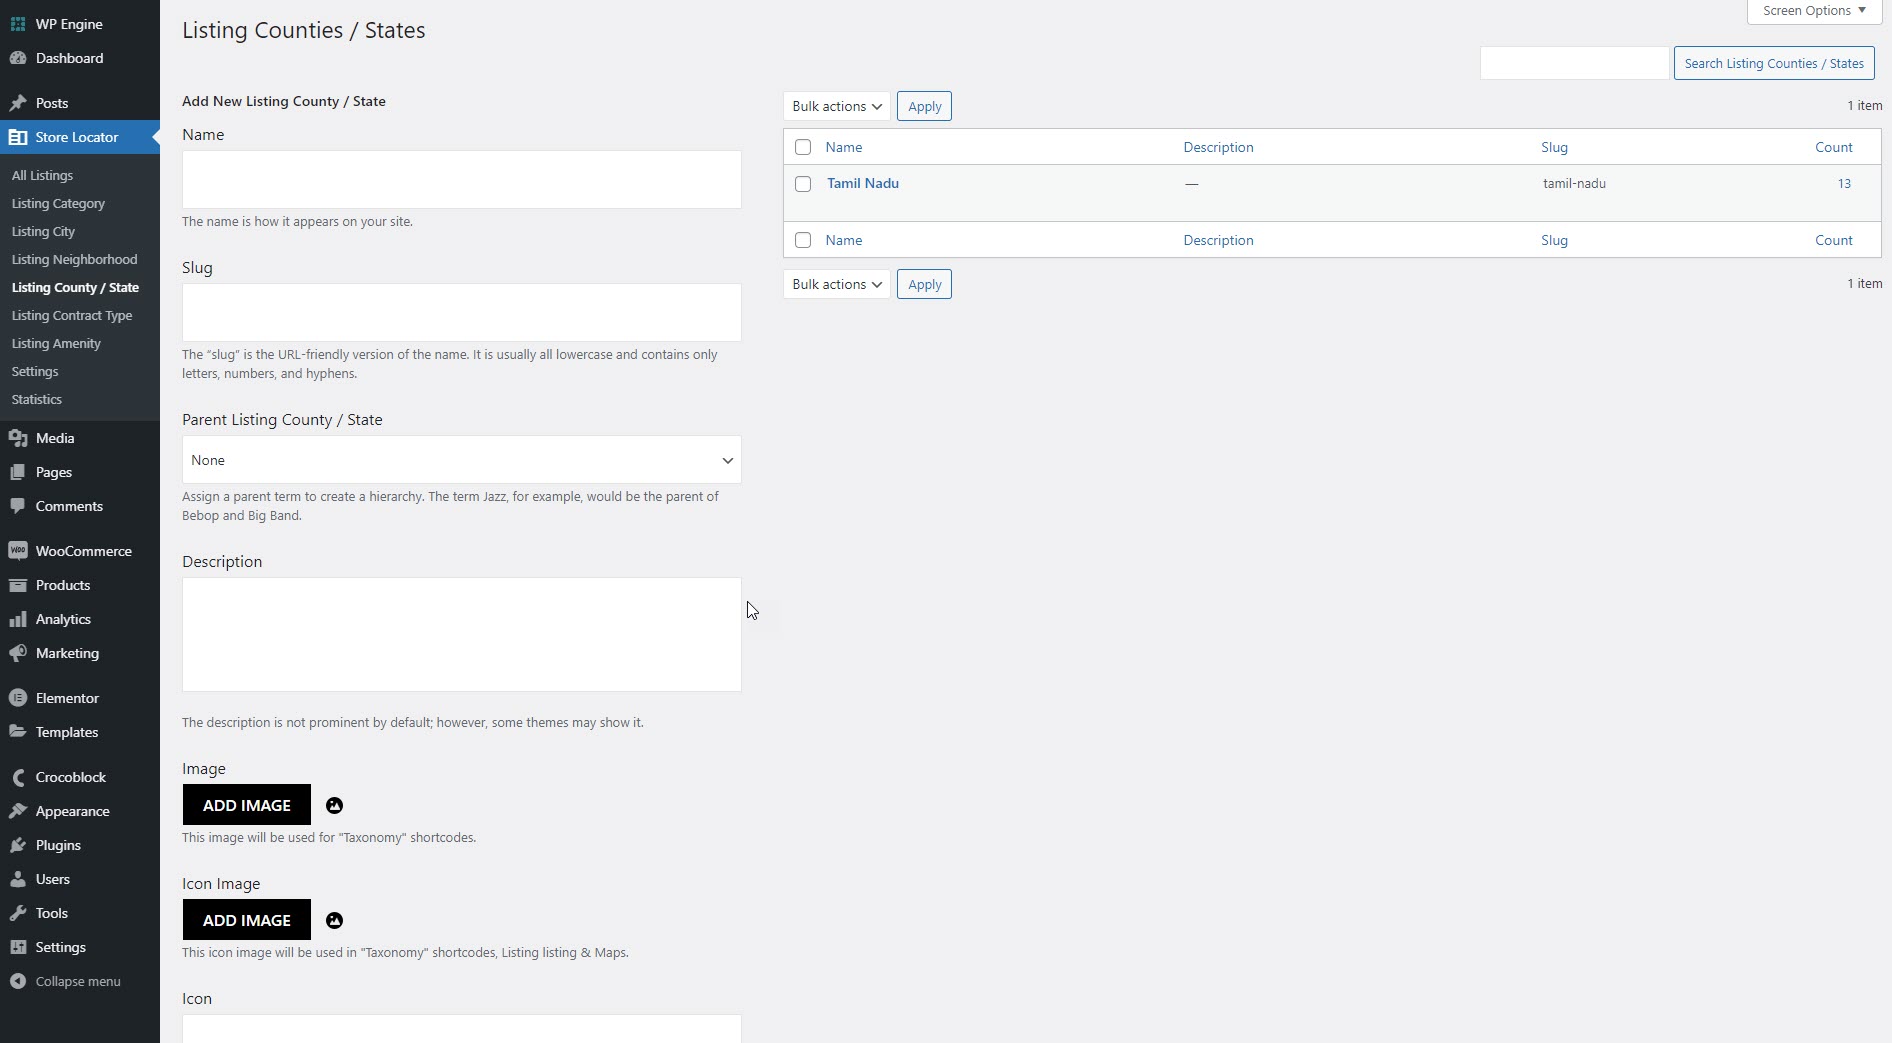
6.5County / State
Locations let you group listings geographically, such as by countries, states, and/or cities. Locations is a custom taxonomy and are hierarchical in structure just like categories.
Step 1 :Follow the steps below to add a County / State to your directory.
Step 2 :Login to your website if not yet logged in and go to the WordPress administration dashboard.
Step 3 :Select Locations under your directory menu in the admin sidebar.
Step 4 :Use the Add Location form displayed next to the location list table. Enter the Name of location and then optionally fill out the Slug and Description fields, select a Parent Location and/or upload a photo for the location from the Photo field.
Step 5 :Click the Add Location button to add your location.
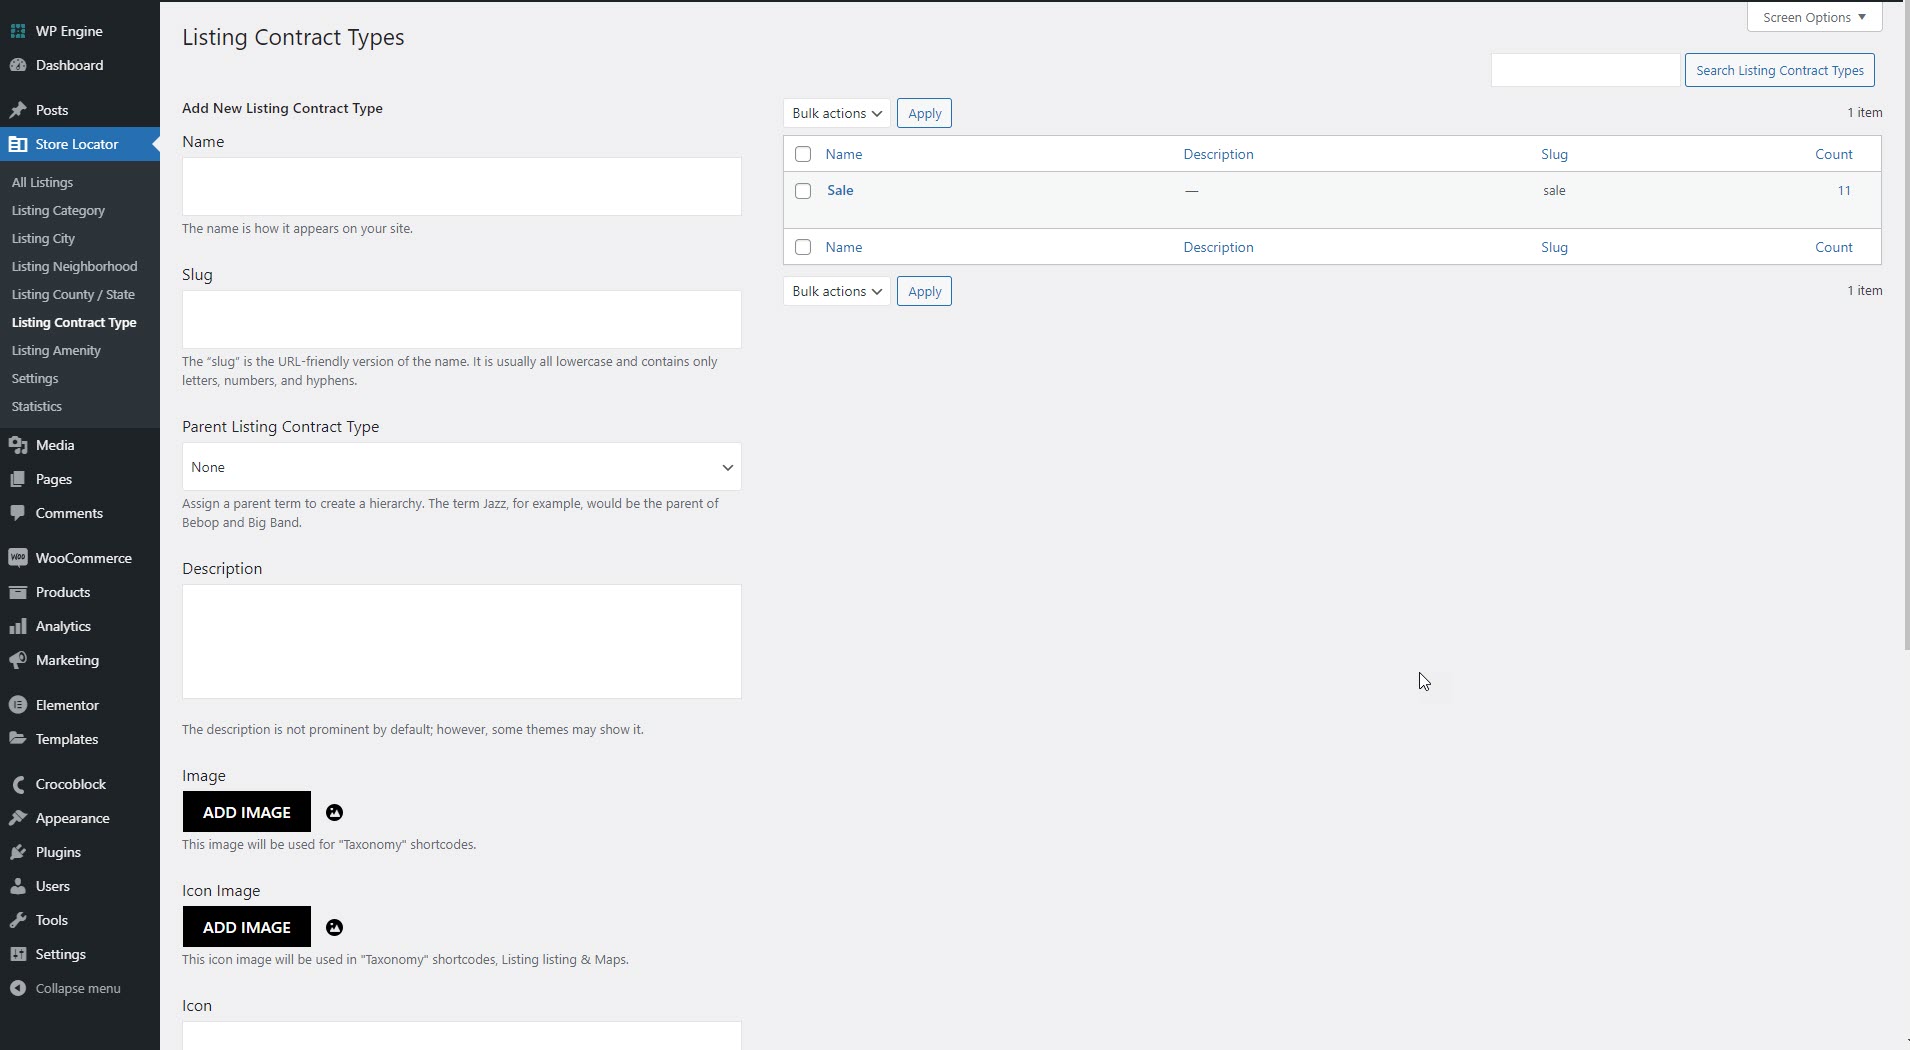
6.6Contract Type
You have full control over the contact information block. You can change everything here. You can show/hide the contact form. And also can add new contact form if you don't want to use default contact form.
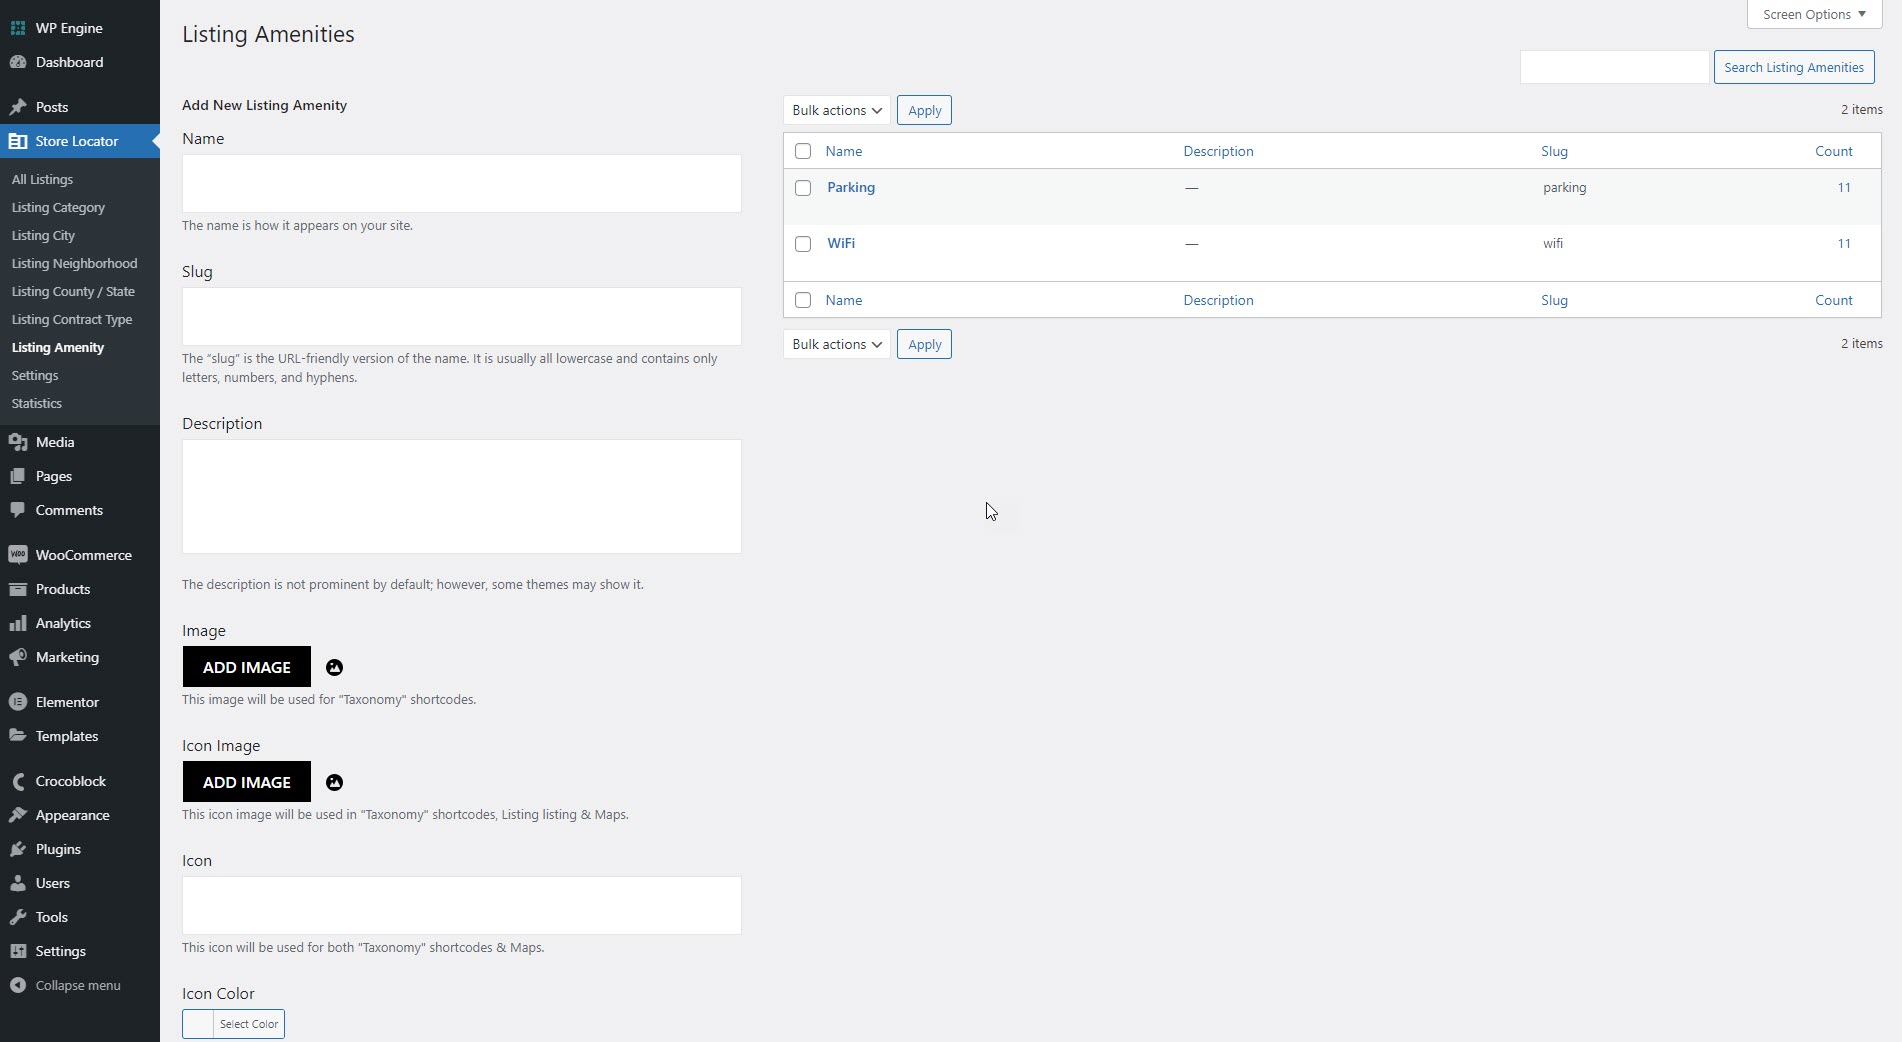
6.7Amenity
It is because of the simple need to create a special lStore Locator listings, bar and restaurant amenities.
6.8Statistics
Adding a location It comes with advanced behavioral data that allows you to deeply analyze your traffic. Made for people who love data, analytics, and stats, Heap makes it possible to generate custom reports, views, and tracking.

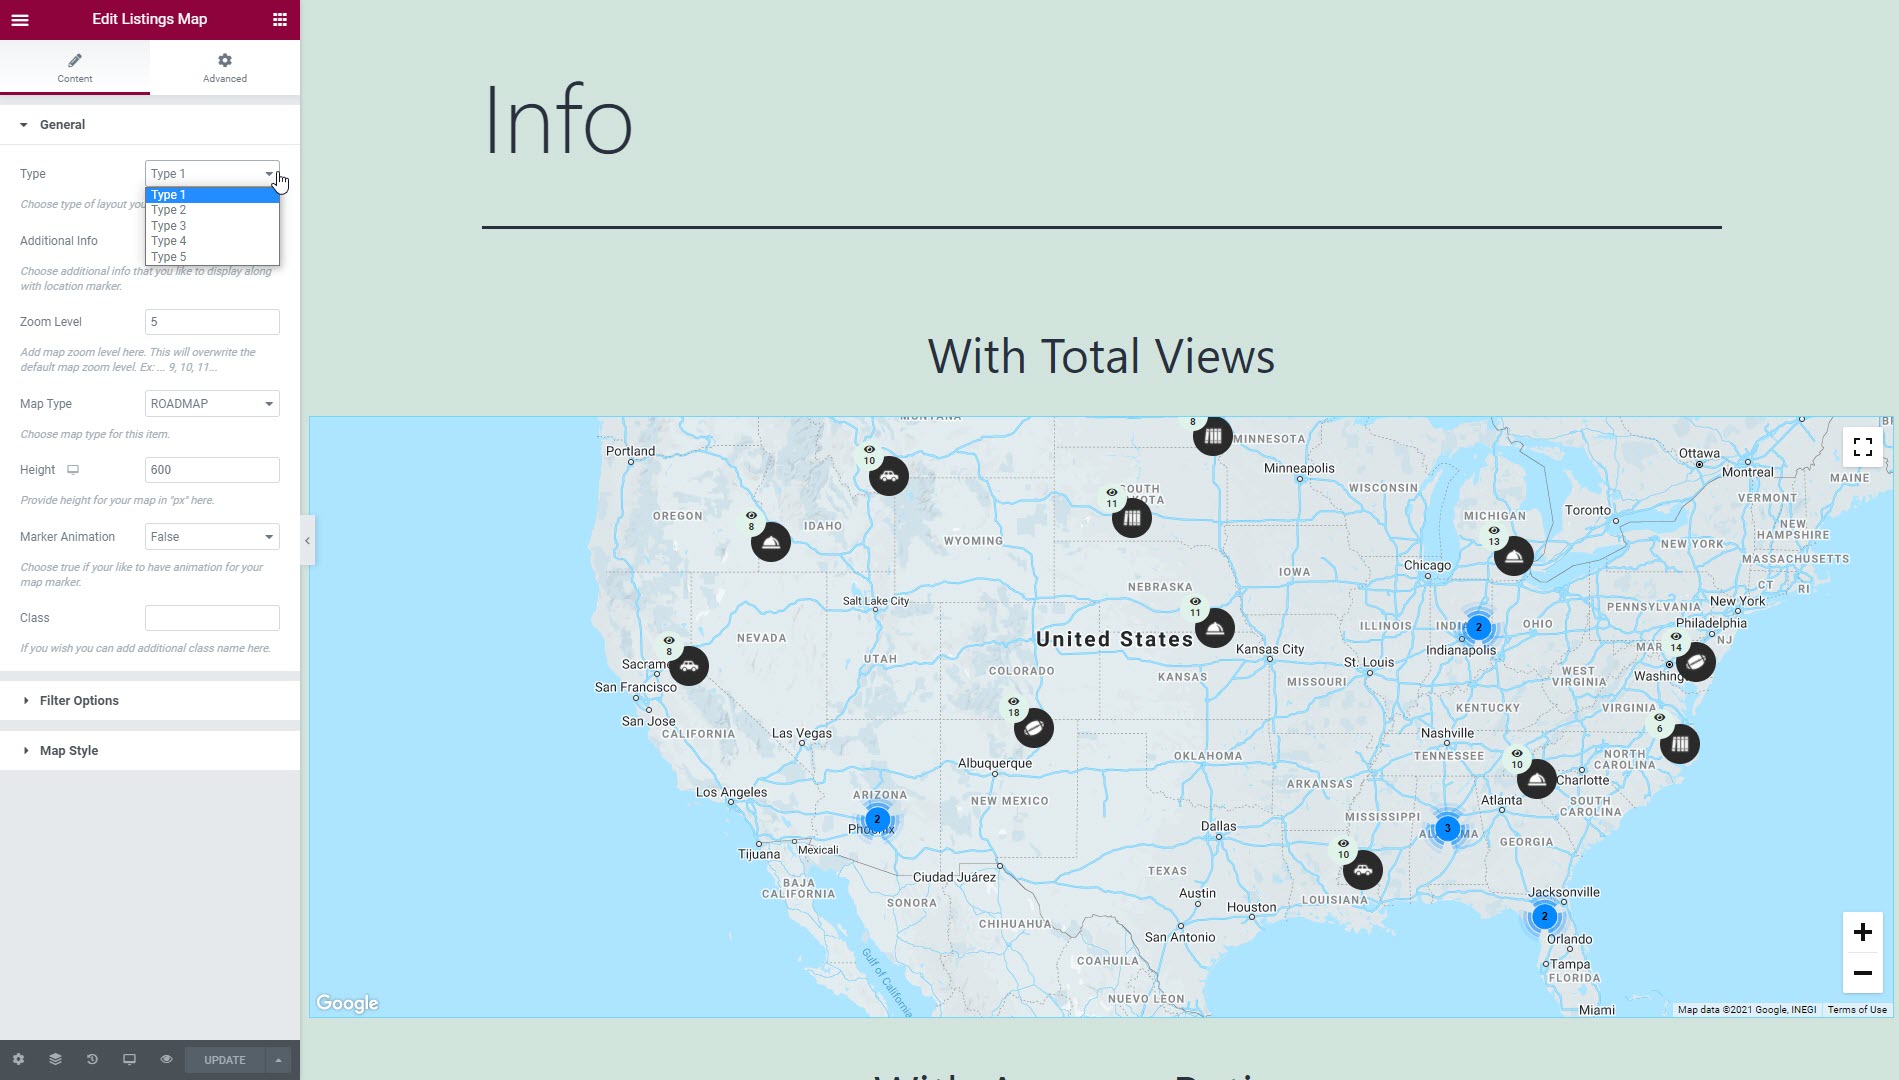
7Map Style
Store Locator is a feature rich module that allows merchants to display their physical store locations on home page and a separate store locator page.
Store Locator module is an amazing tool for merchants who have physical stores at different locations. The module provide you feature to add any number of stores across the world on website and navigating visitors to the required one.
Your locations will be displayed both as markers on Google Maps as well as on a carousel. The carousel is connected to a map, so that when it’s selected it will target the location on the map making it even easier for your readers to find your listings.
Adding locations to your map is simple. All you need to do is add your location’s coordinates to the form on the “Add new post” page. Map works with both default post types as well as custom post types with no restriction on how many custom post types you can use.
7.1Map Features
7.2Search Template

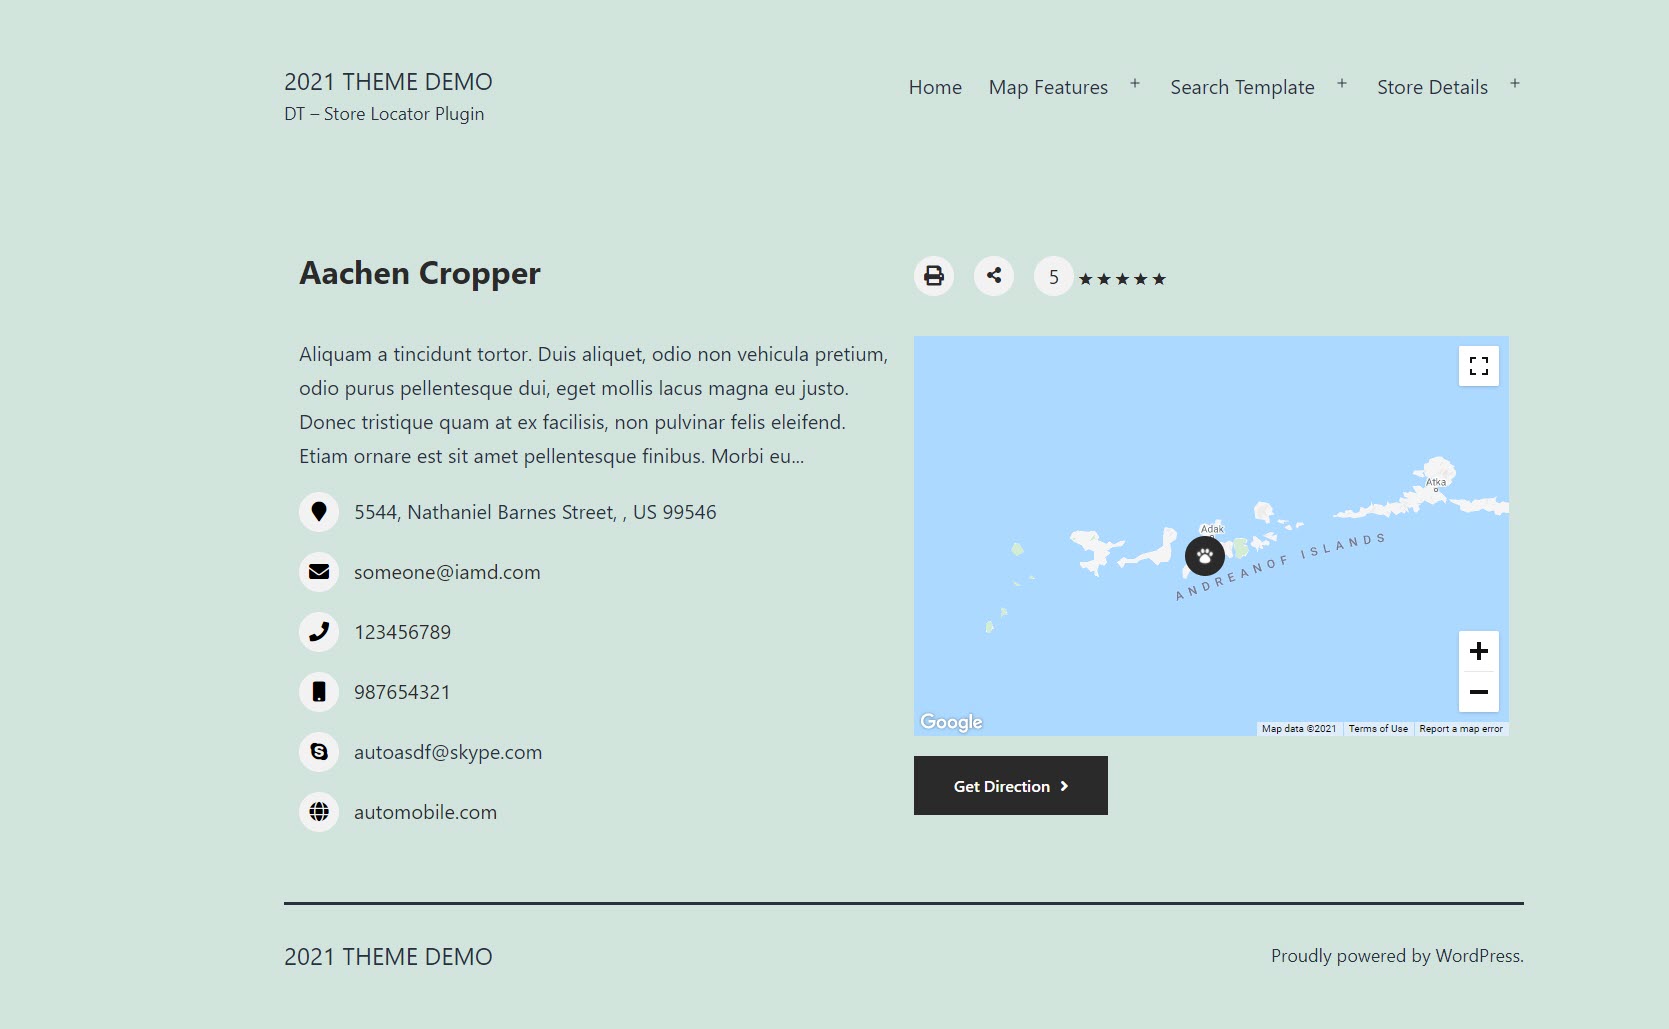
7.3Store Details
8Shortcodes
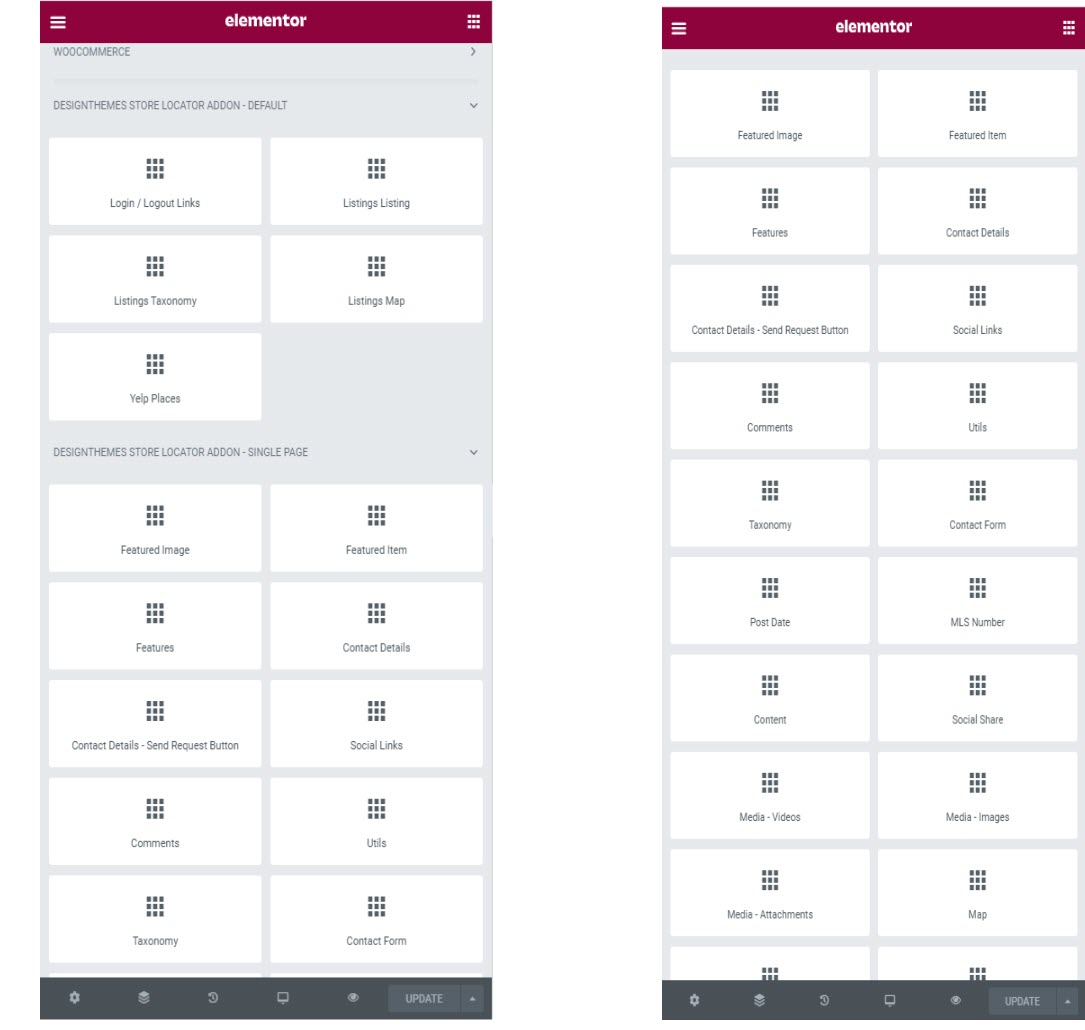
It is compatible with all modern themes, page builders – Visual Composer and Elementor.